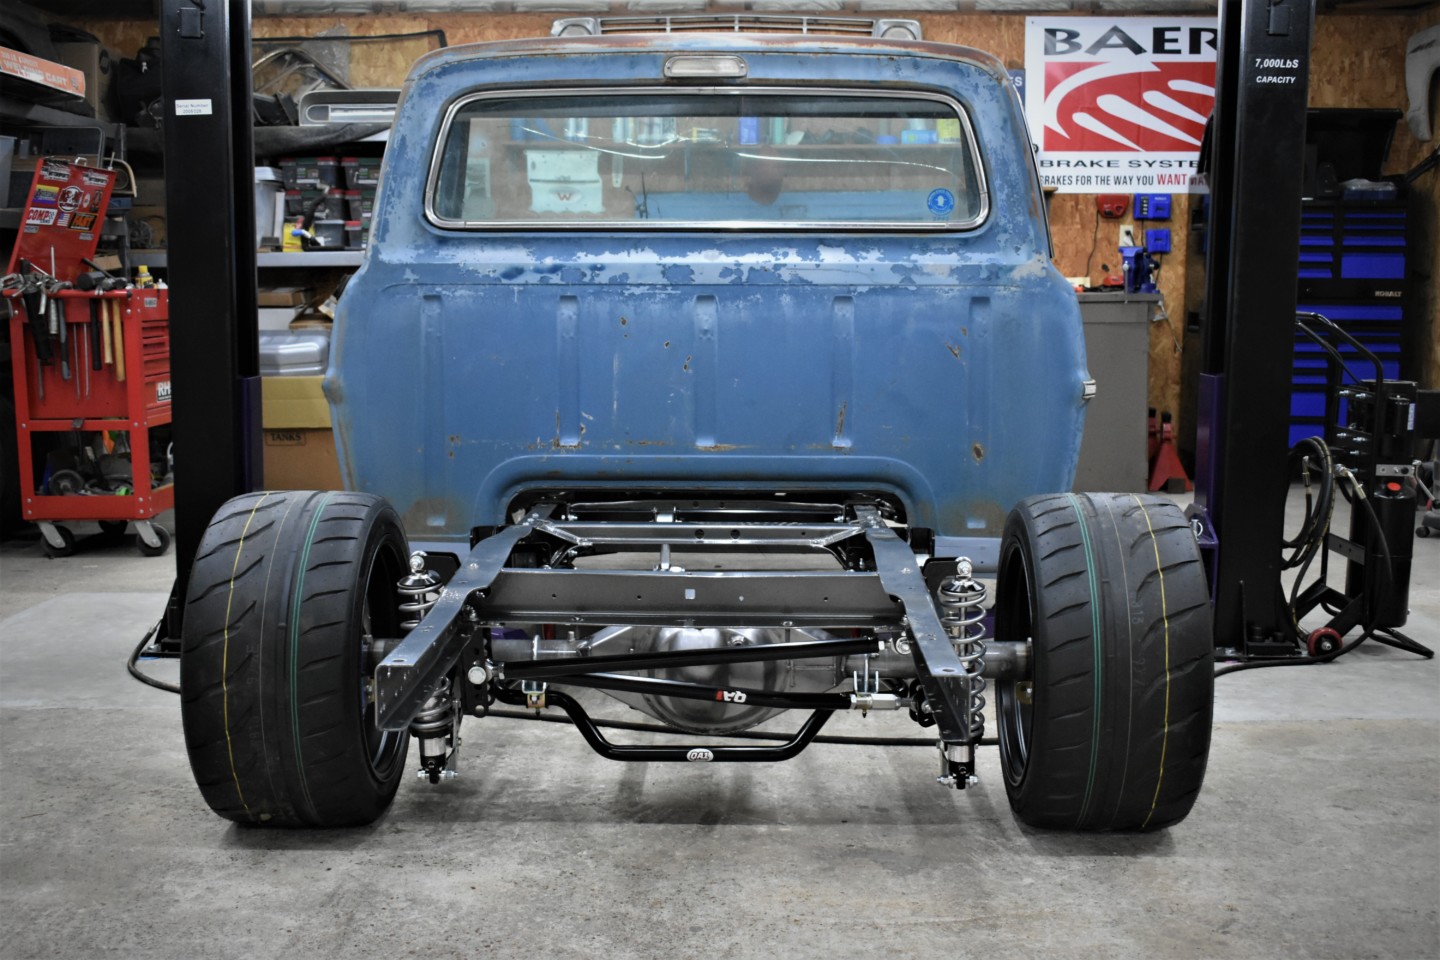
Not long ago, we introduced the newest project vehicle here at Ford Muscle: Project F Word. Ford Muscle staffer Ivan Korda owns the 1969 F-100, purchased with the goal of turning it into a “Pro Touring” type truck. It will eventually see street duty, stretch its legs in autocross, and occasionally haul things. So far, Project F Word has been equipped with a brand spankin’ new Silver Sport Transmissions Tremec Magnum transmission in place of its original automatic, and the front half of QA1’s bolt-in suspension system. If you’ve been waiting for Part 2 and all of the details on the rear half, you’re in luck!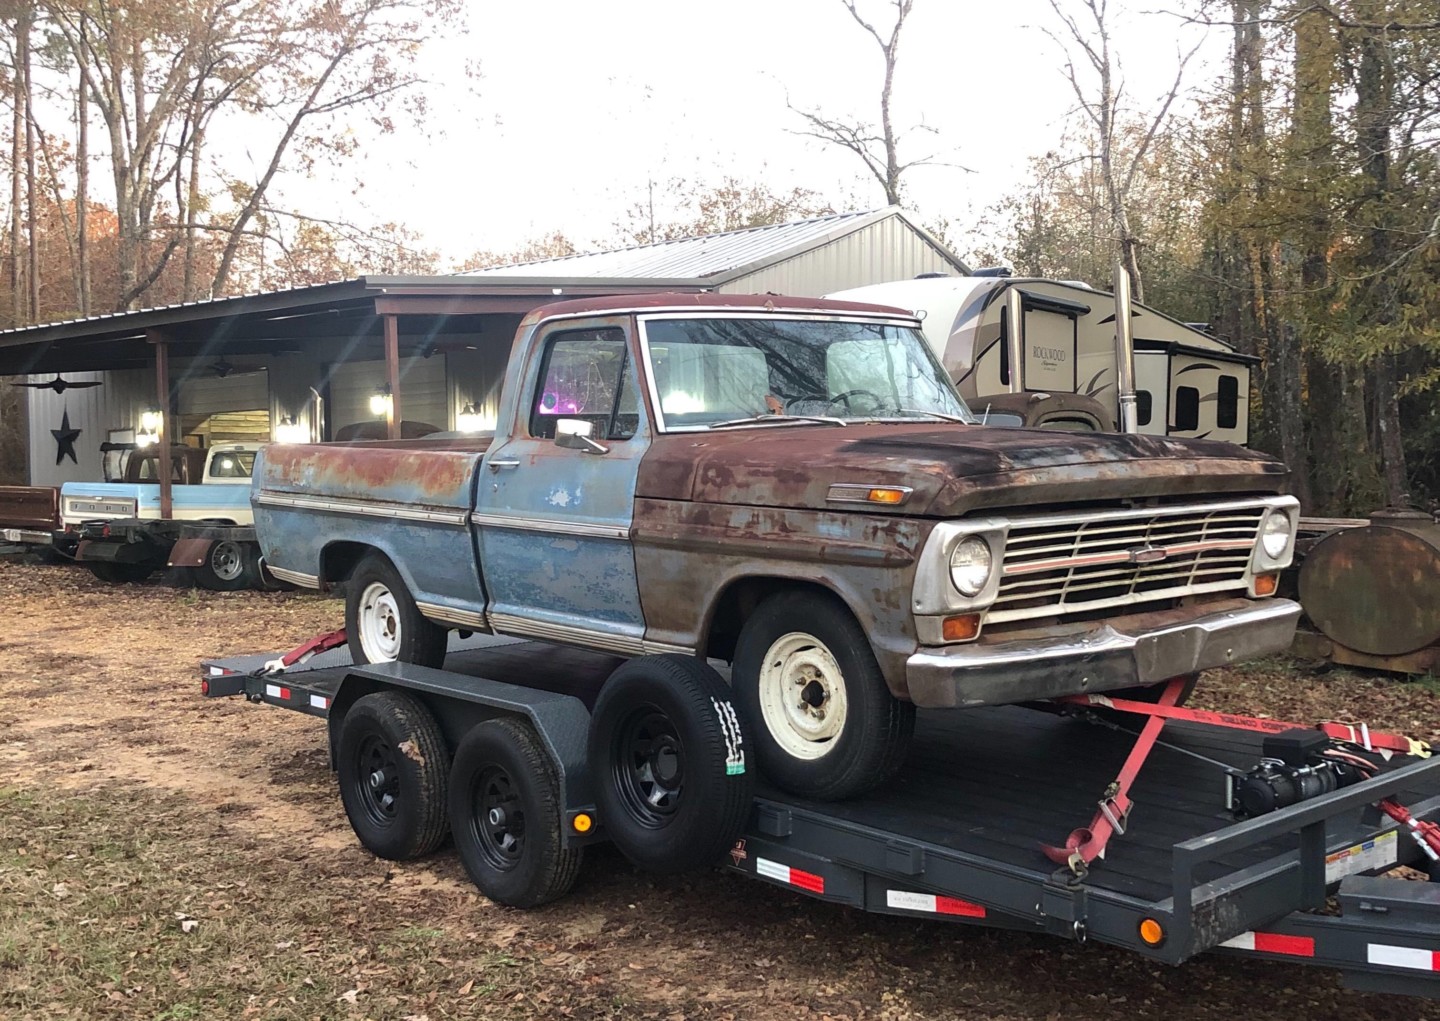
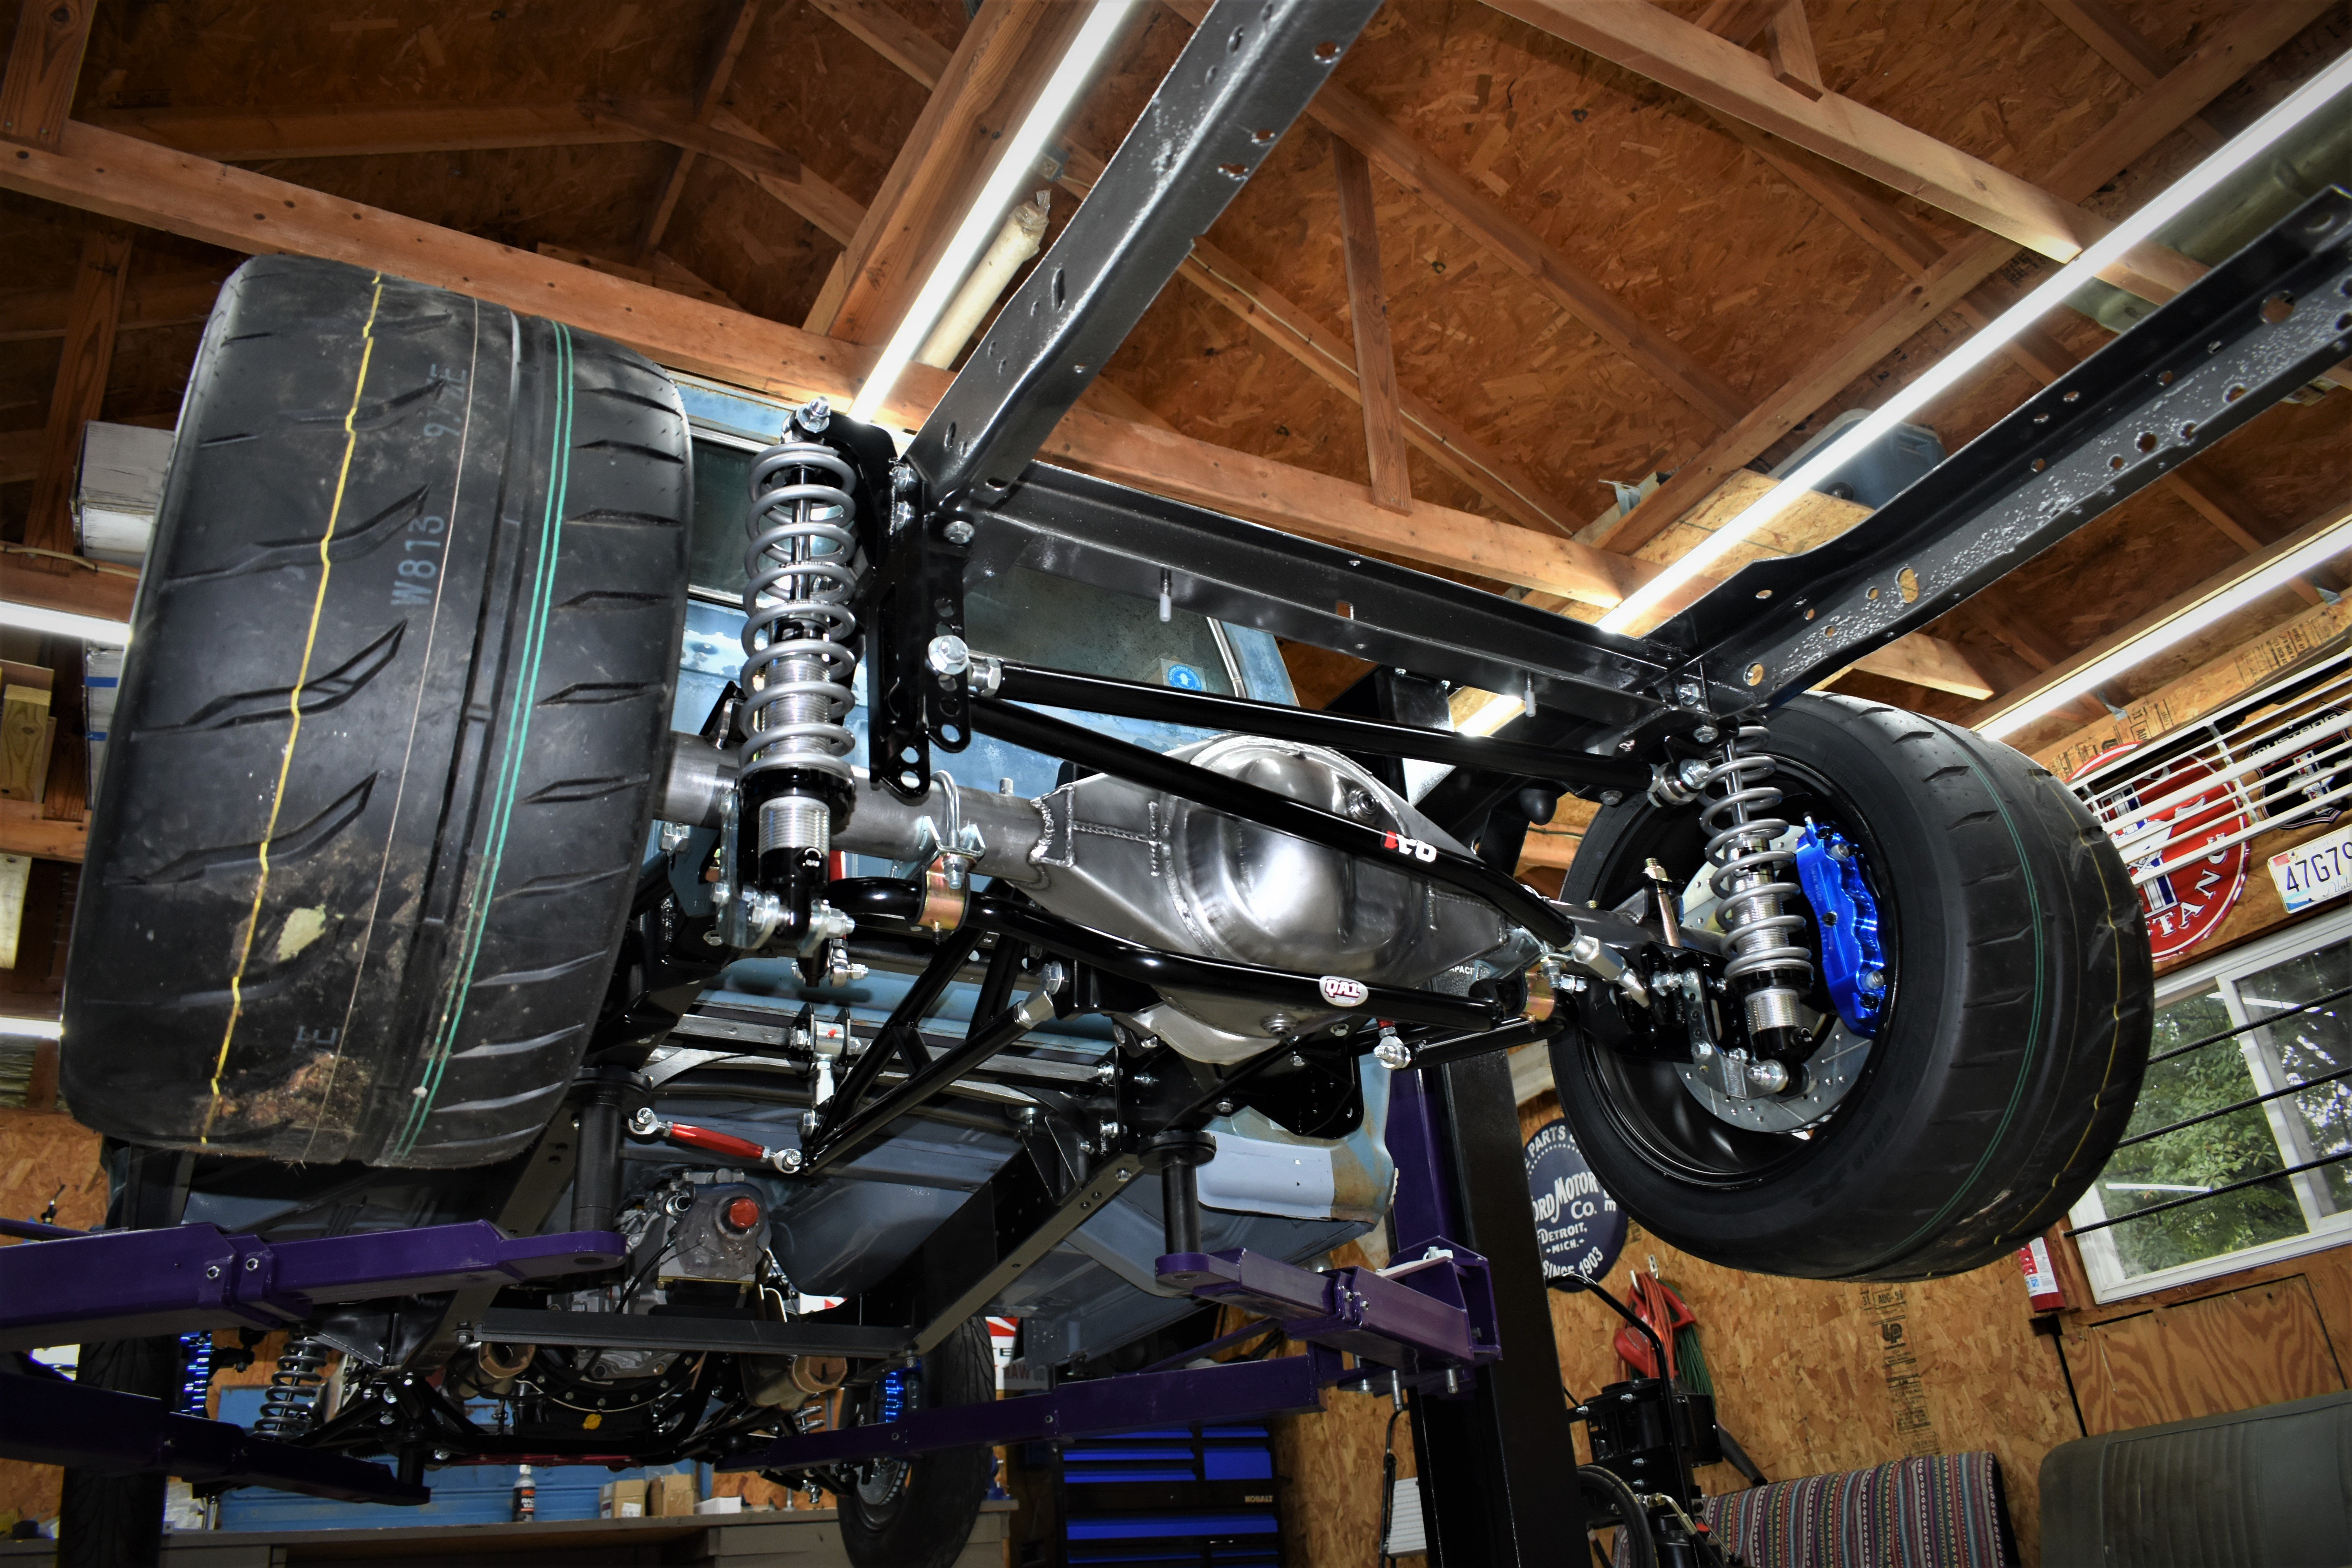
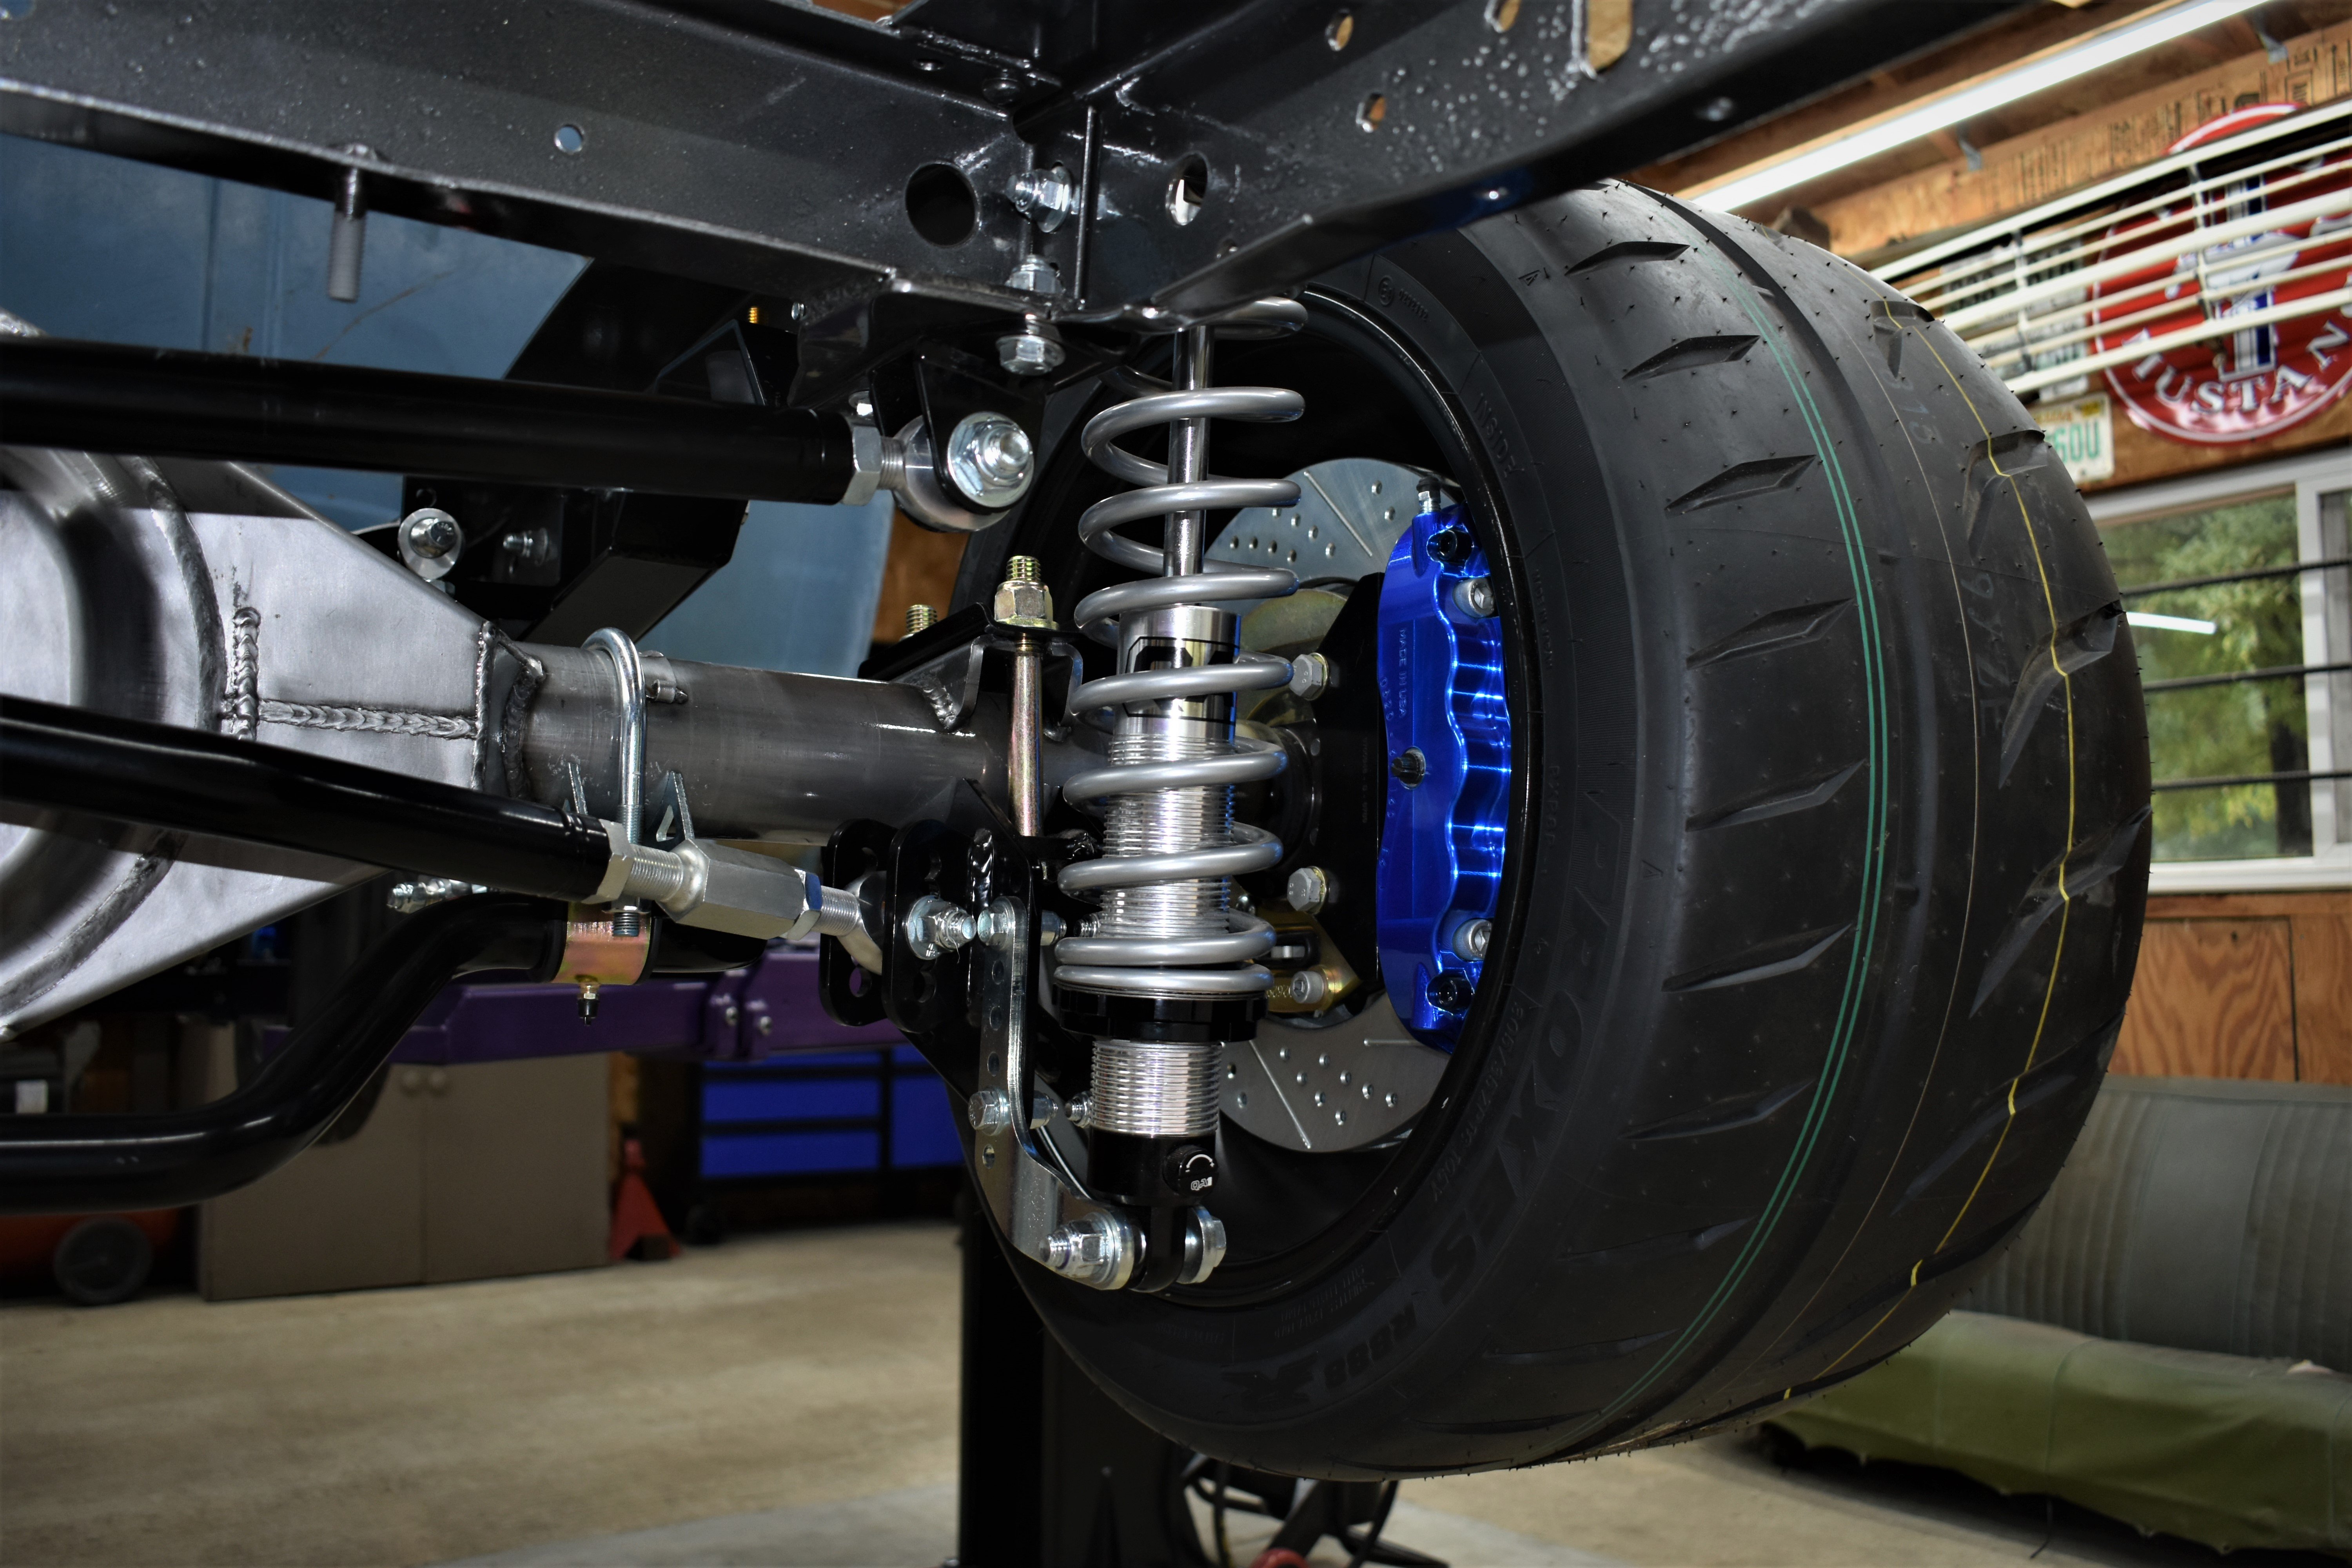
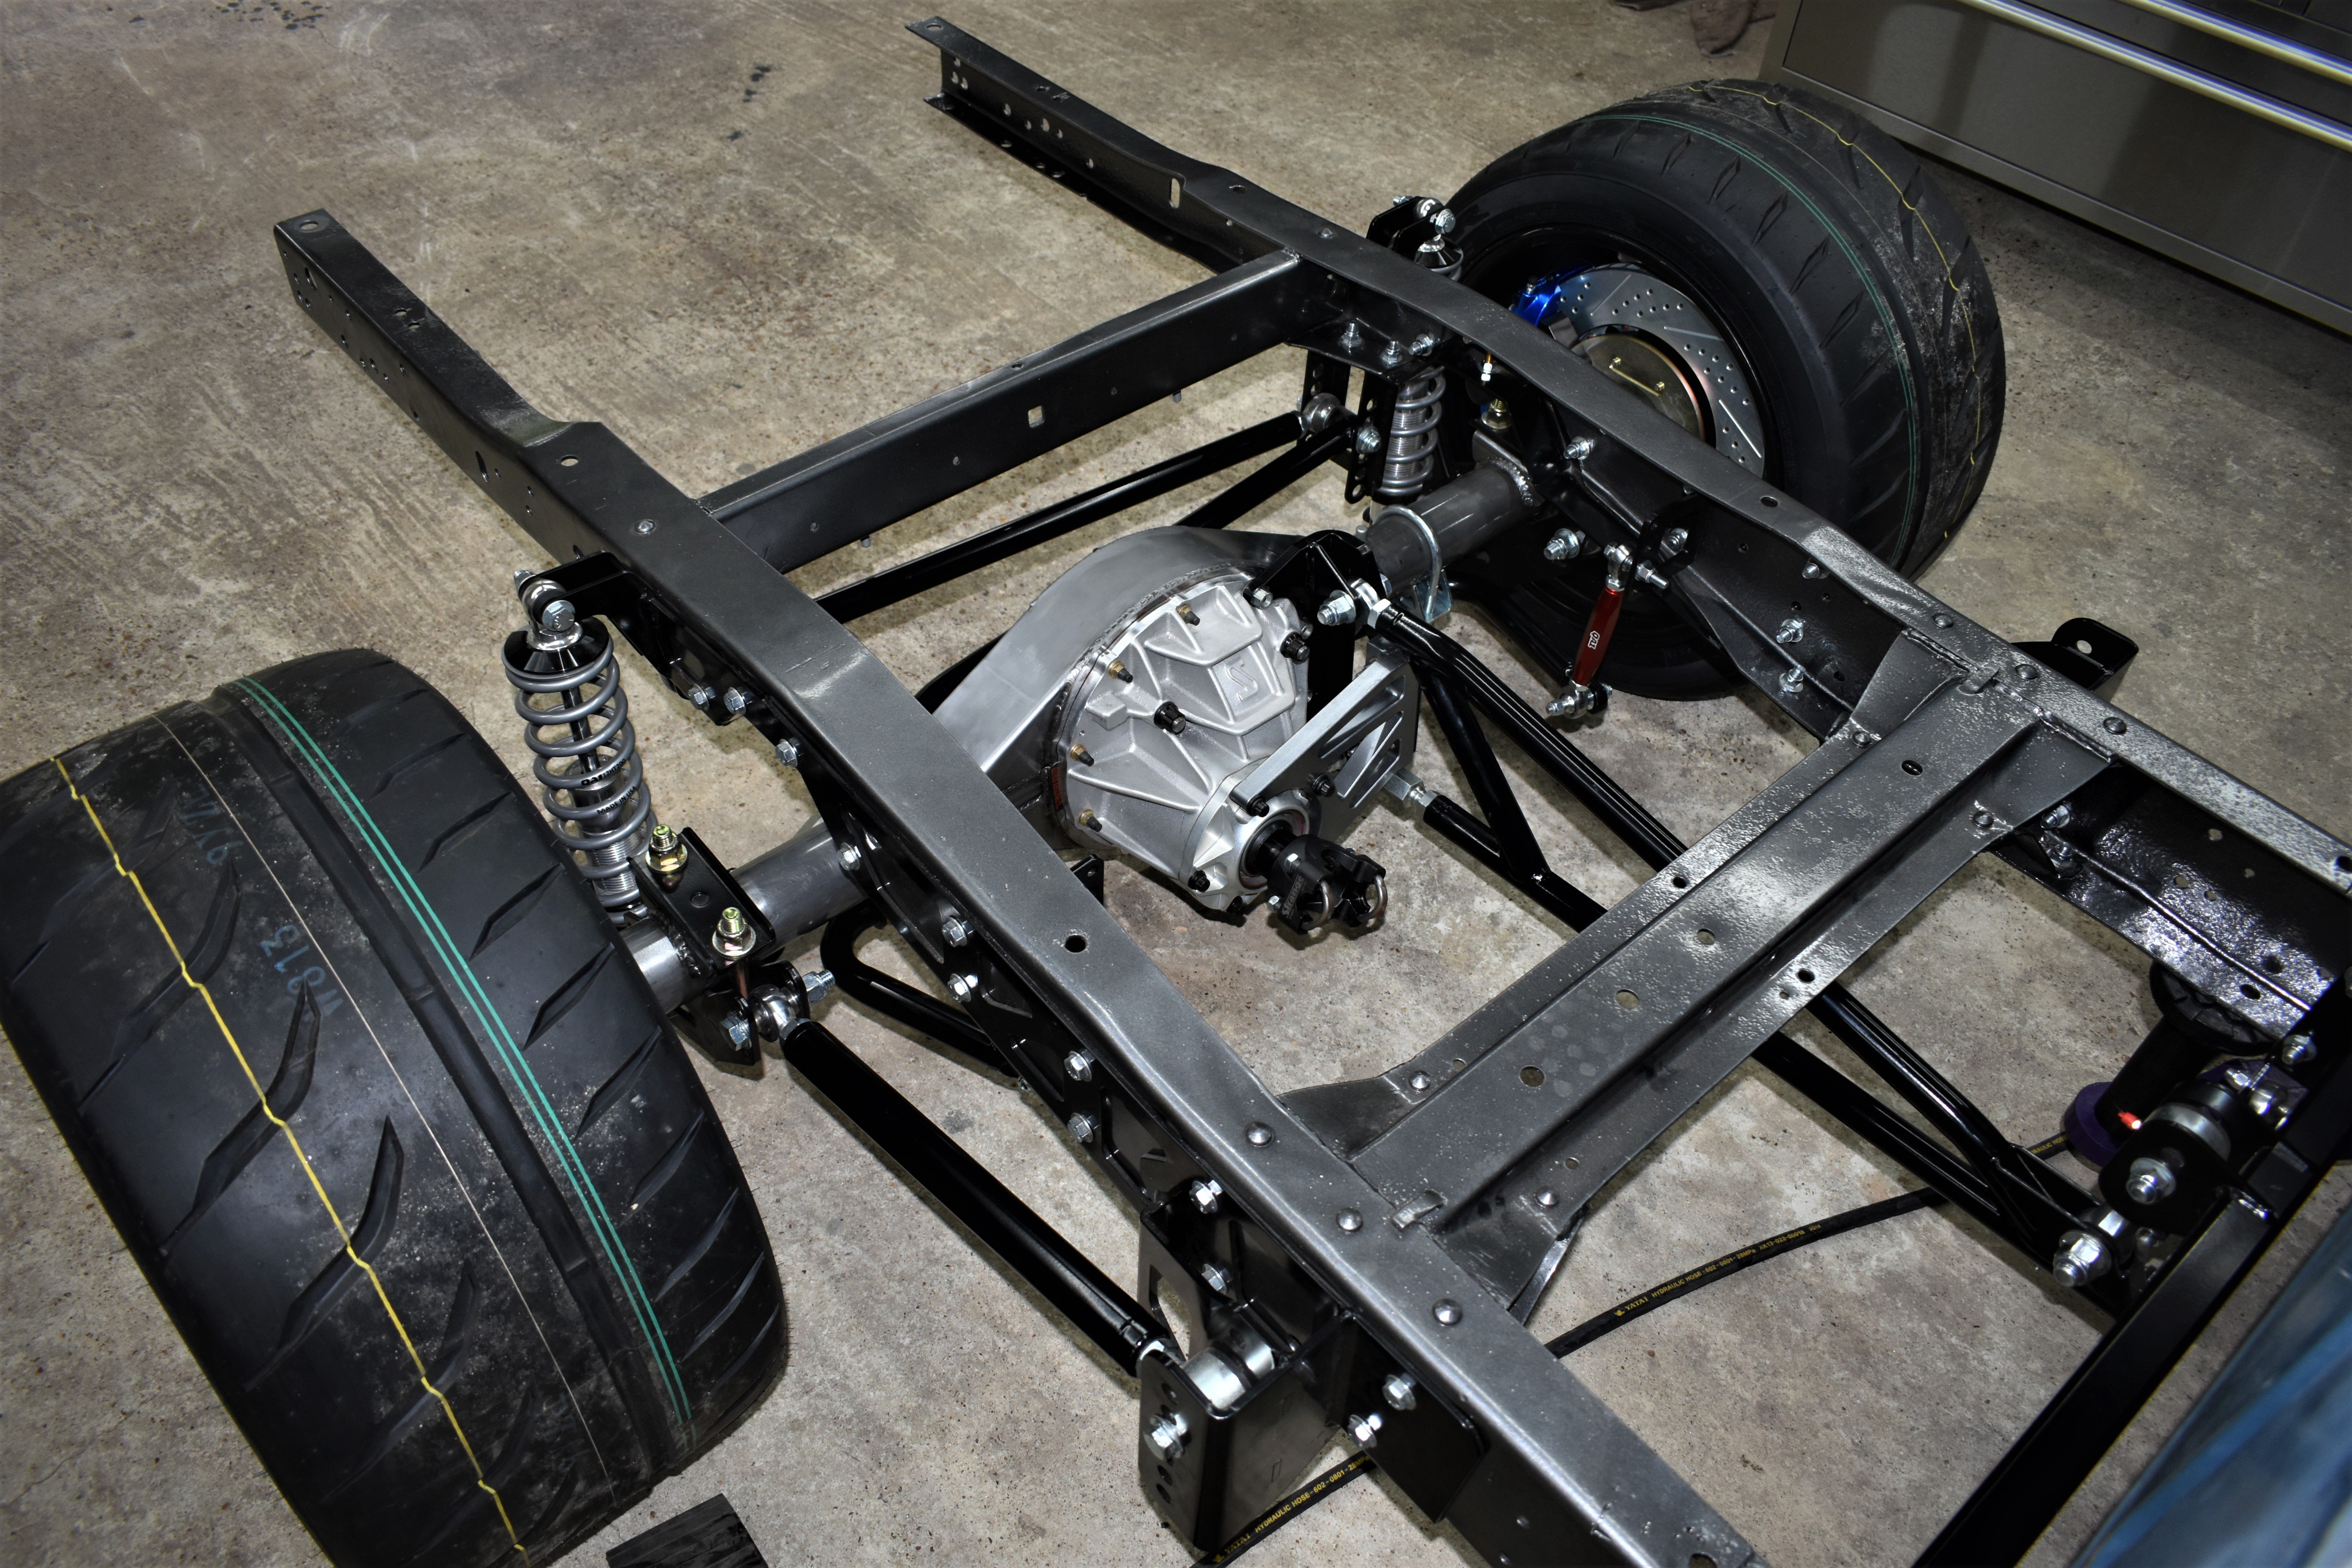
The rear half of QA1’s bolt-in suspension system for 1965 to 1972 F100s includes your choice of single or double adjustable coilover shocks or QA1’s Mod Series Shocks, as well as an adjustable torque arm and adjustable pinion angle adjuster. The choice between shocks allows the user to change valving to meet specific needs and offers ride height adjustability, and you also have your choice between three high-travel spring rate options (170, 200, or 250 lb/in). The included adjustable trailing arms allow for fine-tuned wheelbase and rear alignment, with a wide range of adjustment positions accommodating a range of ride heights. The QA1 X-series rod ends chosen for the kit are built for performance and durability. Ivan also opted to add the optional 1-1/4-inch QA1 Rear Sway Bar. Tubular High-strength low-alloy steel construction provides much-needed strength and durability.
This system was developed with handling in mind and provides height adjustability for the ability to dial in the perfect stance. Let’s face it, having an aggressive looking stance is important. But it’s also important to have a lower roll center to improve the handling. Basically, QA1 set out to bring the performance and drivability of these old trucks into the modern era. It allows for larger and wider wheels and tires (up to 305/35R18) and offers a 4-inch to 7-inch drop, designed to maximize performance while thwarting the inherent binding issues that plague 4-link systems. QA1 instead chose a torque arm setup with a pivot arm to allow the rear axle to move slightly under hard braking instead of axle hopping. The torque arm is complimented by a Panhard bar to locate the rearend (side to side) and lower control arms to control the movement of each wheel.
“We have found great success with the torque arm designs for several classic pickup truck chassis we support,” said Dave Kass, marketing manager at QA1. “With the torque arm, we were able to eliminate the bind often found in traditional four-link systems while increasing the ability for the truck to gain traction. Torque arm systems like the one we have do a very good job promoting traction under hard acceleration.”
As with the front half of the system, the rear half features a completely bolt-in installation process — that’s right, no welding required. Ivan completed the installation in his home garage, using many of the tools you probably have in your own workshop. Everything needed for the installation process is included in the kit, hardware and all, and everything is proudly made in QA1’s Lakeville, Minnesota facility. Ivan told us that the rear half installation was even easier (and quicker) than the front half, and that’s saying quite a bit.
If you’re new here, you might want to go back and read Part 1 first. After all, one comes before two!
The Installation Process
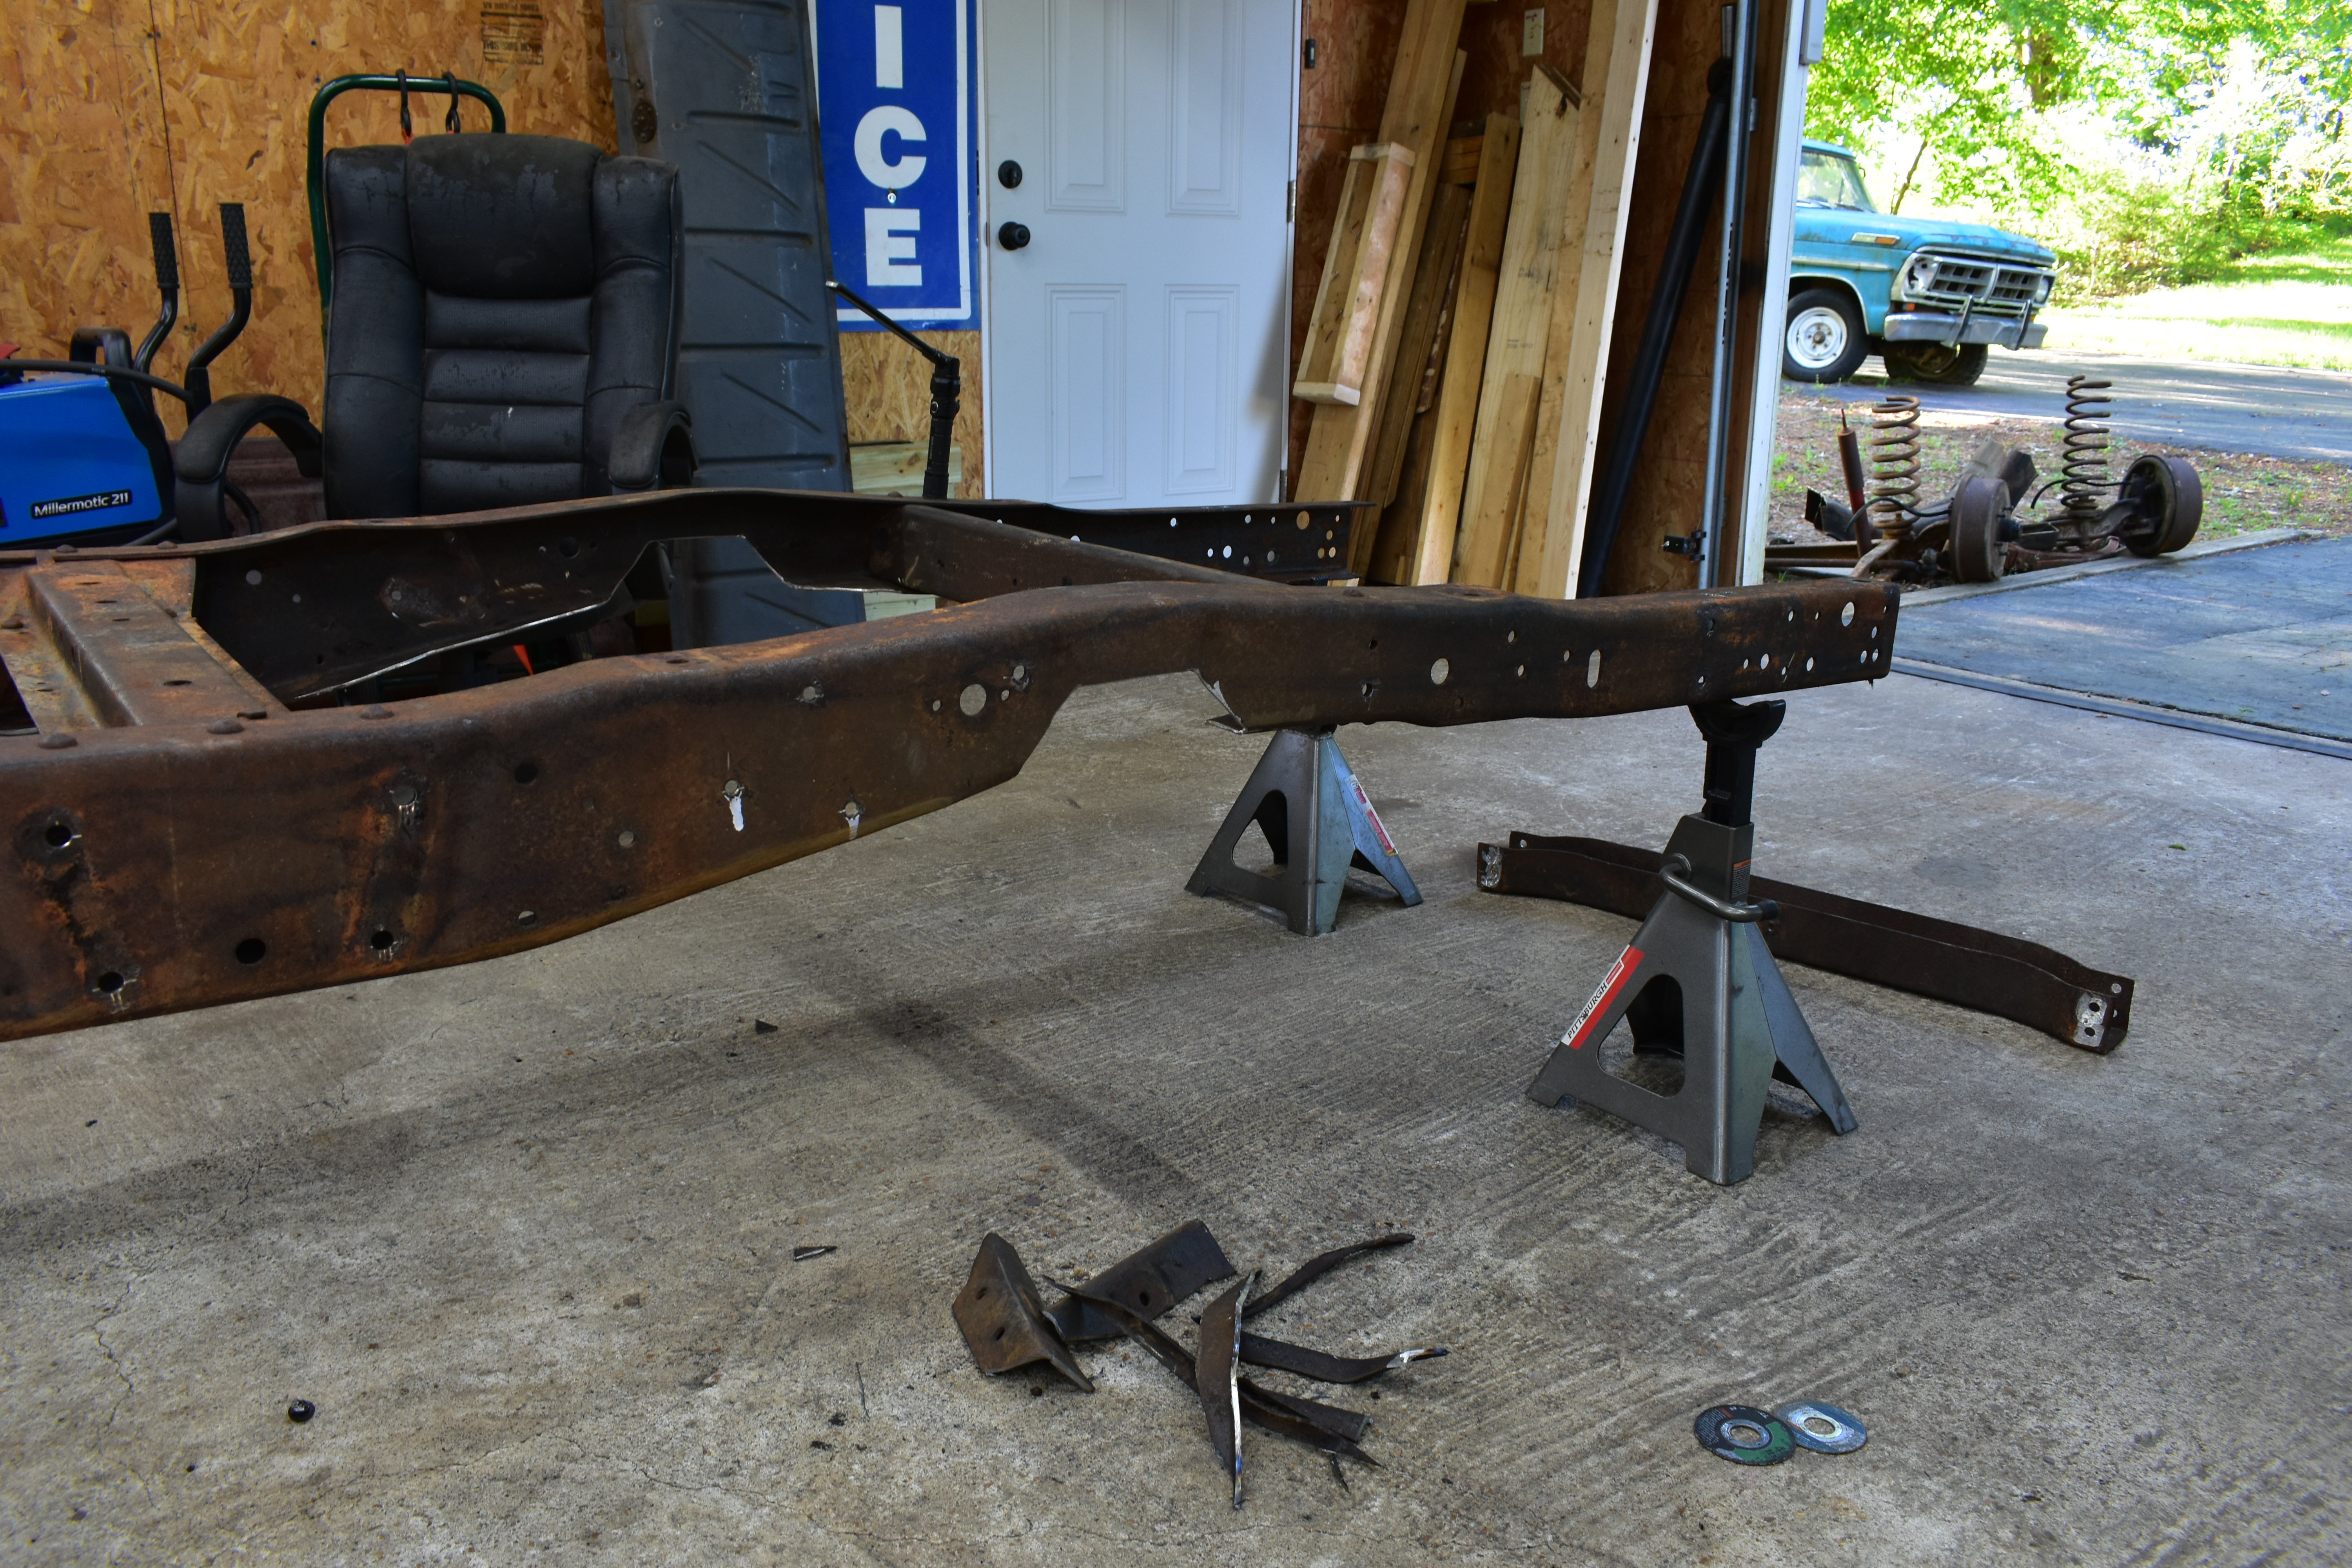
While the bed does not need to be removed to complete this installation, Ivan had removed the bed as part of the truck’s complete restoration and rebuild. Bringing the F100 down to its frame allowed Ivan to bring the frame to be powdercoated as well (see inset). Now on to the installation!
One Flawless Frame
Project F Word’s owner Ivan Korda explains the decision behind powdercoating the truck’s frame, and how it was done.
[group_caption caption="" type="2" images="https://www.speednik.com/image/2020/10/project-f-word-receives-a-bolt-in-qa1-suspension-part-2-2020-10-30_18-54-23_434340.jpg, https://www.speednik.com/image/2020/10/project-f-word-receives-a-bolt-in-qa1-suspension-part-2-2020-10-30_18-54-15_711647.jpg"]
“My plan from the beginning was to strip the frame by hand to make sure I removed the 50 years of dirt and rust, before I bolted the new shiny QA1 parts on. One day, after I posted a picture of me disassembling the stock frame on social media, I got a call from a good friend of mine, Daniel Powers, who owns Dirty White Boyz Kustom Coating in Millington, Tennessee. Daniel said to me, ‘hey man, let’s powdercoat that frame! Forget painting it!’ I was all in.
[group_caption caption="" type="2" images="https://www.speednik.com/image/2020/10/project-f-word-receives-a-bolt-in-qa1-suspension-part-2-2020-10-30_18-53-49_948633.jpg, https://www.speednik.com/image/2020/10/project-f-word-receives-a-bolt-in-qa1-suspension-part-2-2020-10-30_18-53-57_927842.jpg"]
“Daniel didn’t have a large enough oven at the time, so he contacted Reno King, owner of Armour Koating in Woodlawn, Tennessee. Reno opened his doors to us, and we sandblasted and powdercoated the frame at his shop. This was my first time being around the process, and what an experience it was to shoot my own parts!”
[group_caption caption="" type="2" images="https://www.speednik.com/image/2020/10/project-f-word-receives-a-bolt-in-qa1-suspension-part-2-2020-10-30_18-54-32_221231.jpg,https://www.speednik.com/image/2020/10/project-f-word-receives-a-bolt-in-qa1-suspension-part-2-2020-10-30_18-54-39_887433.jpg"]
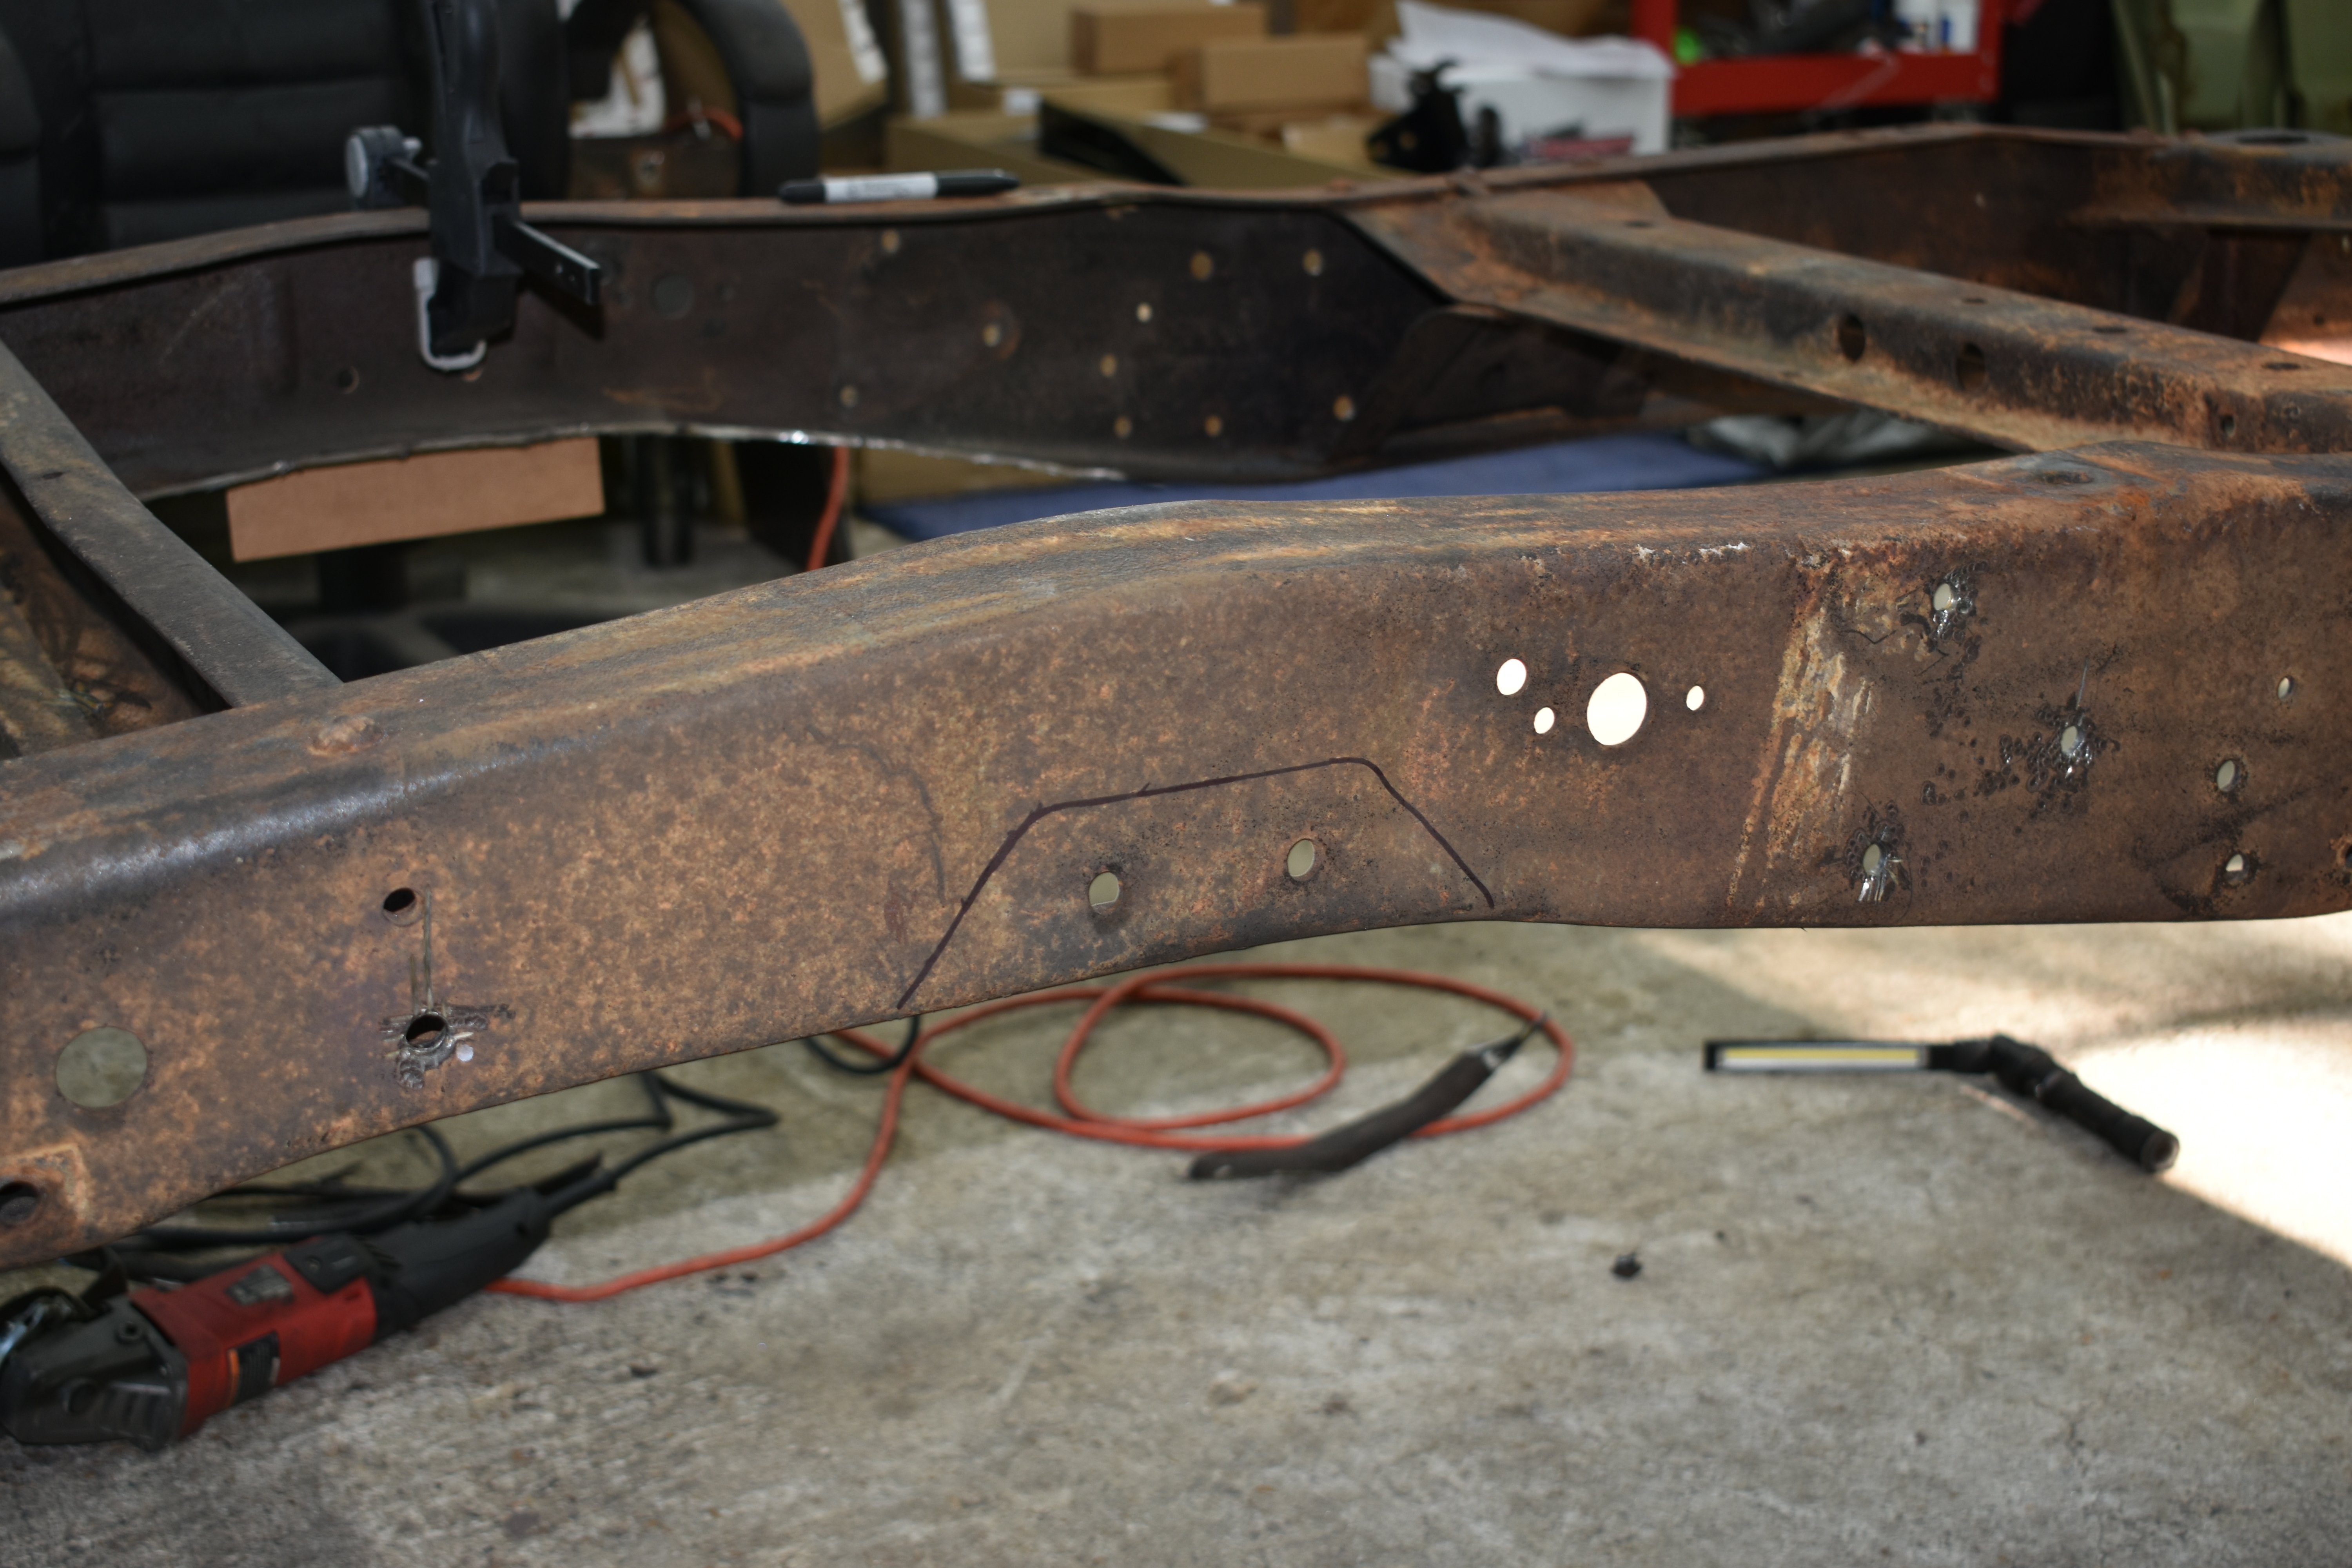
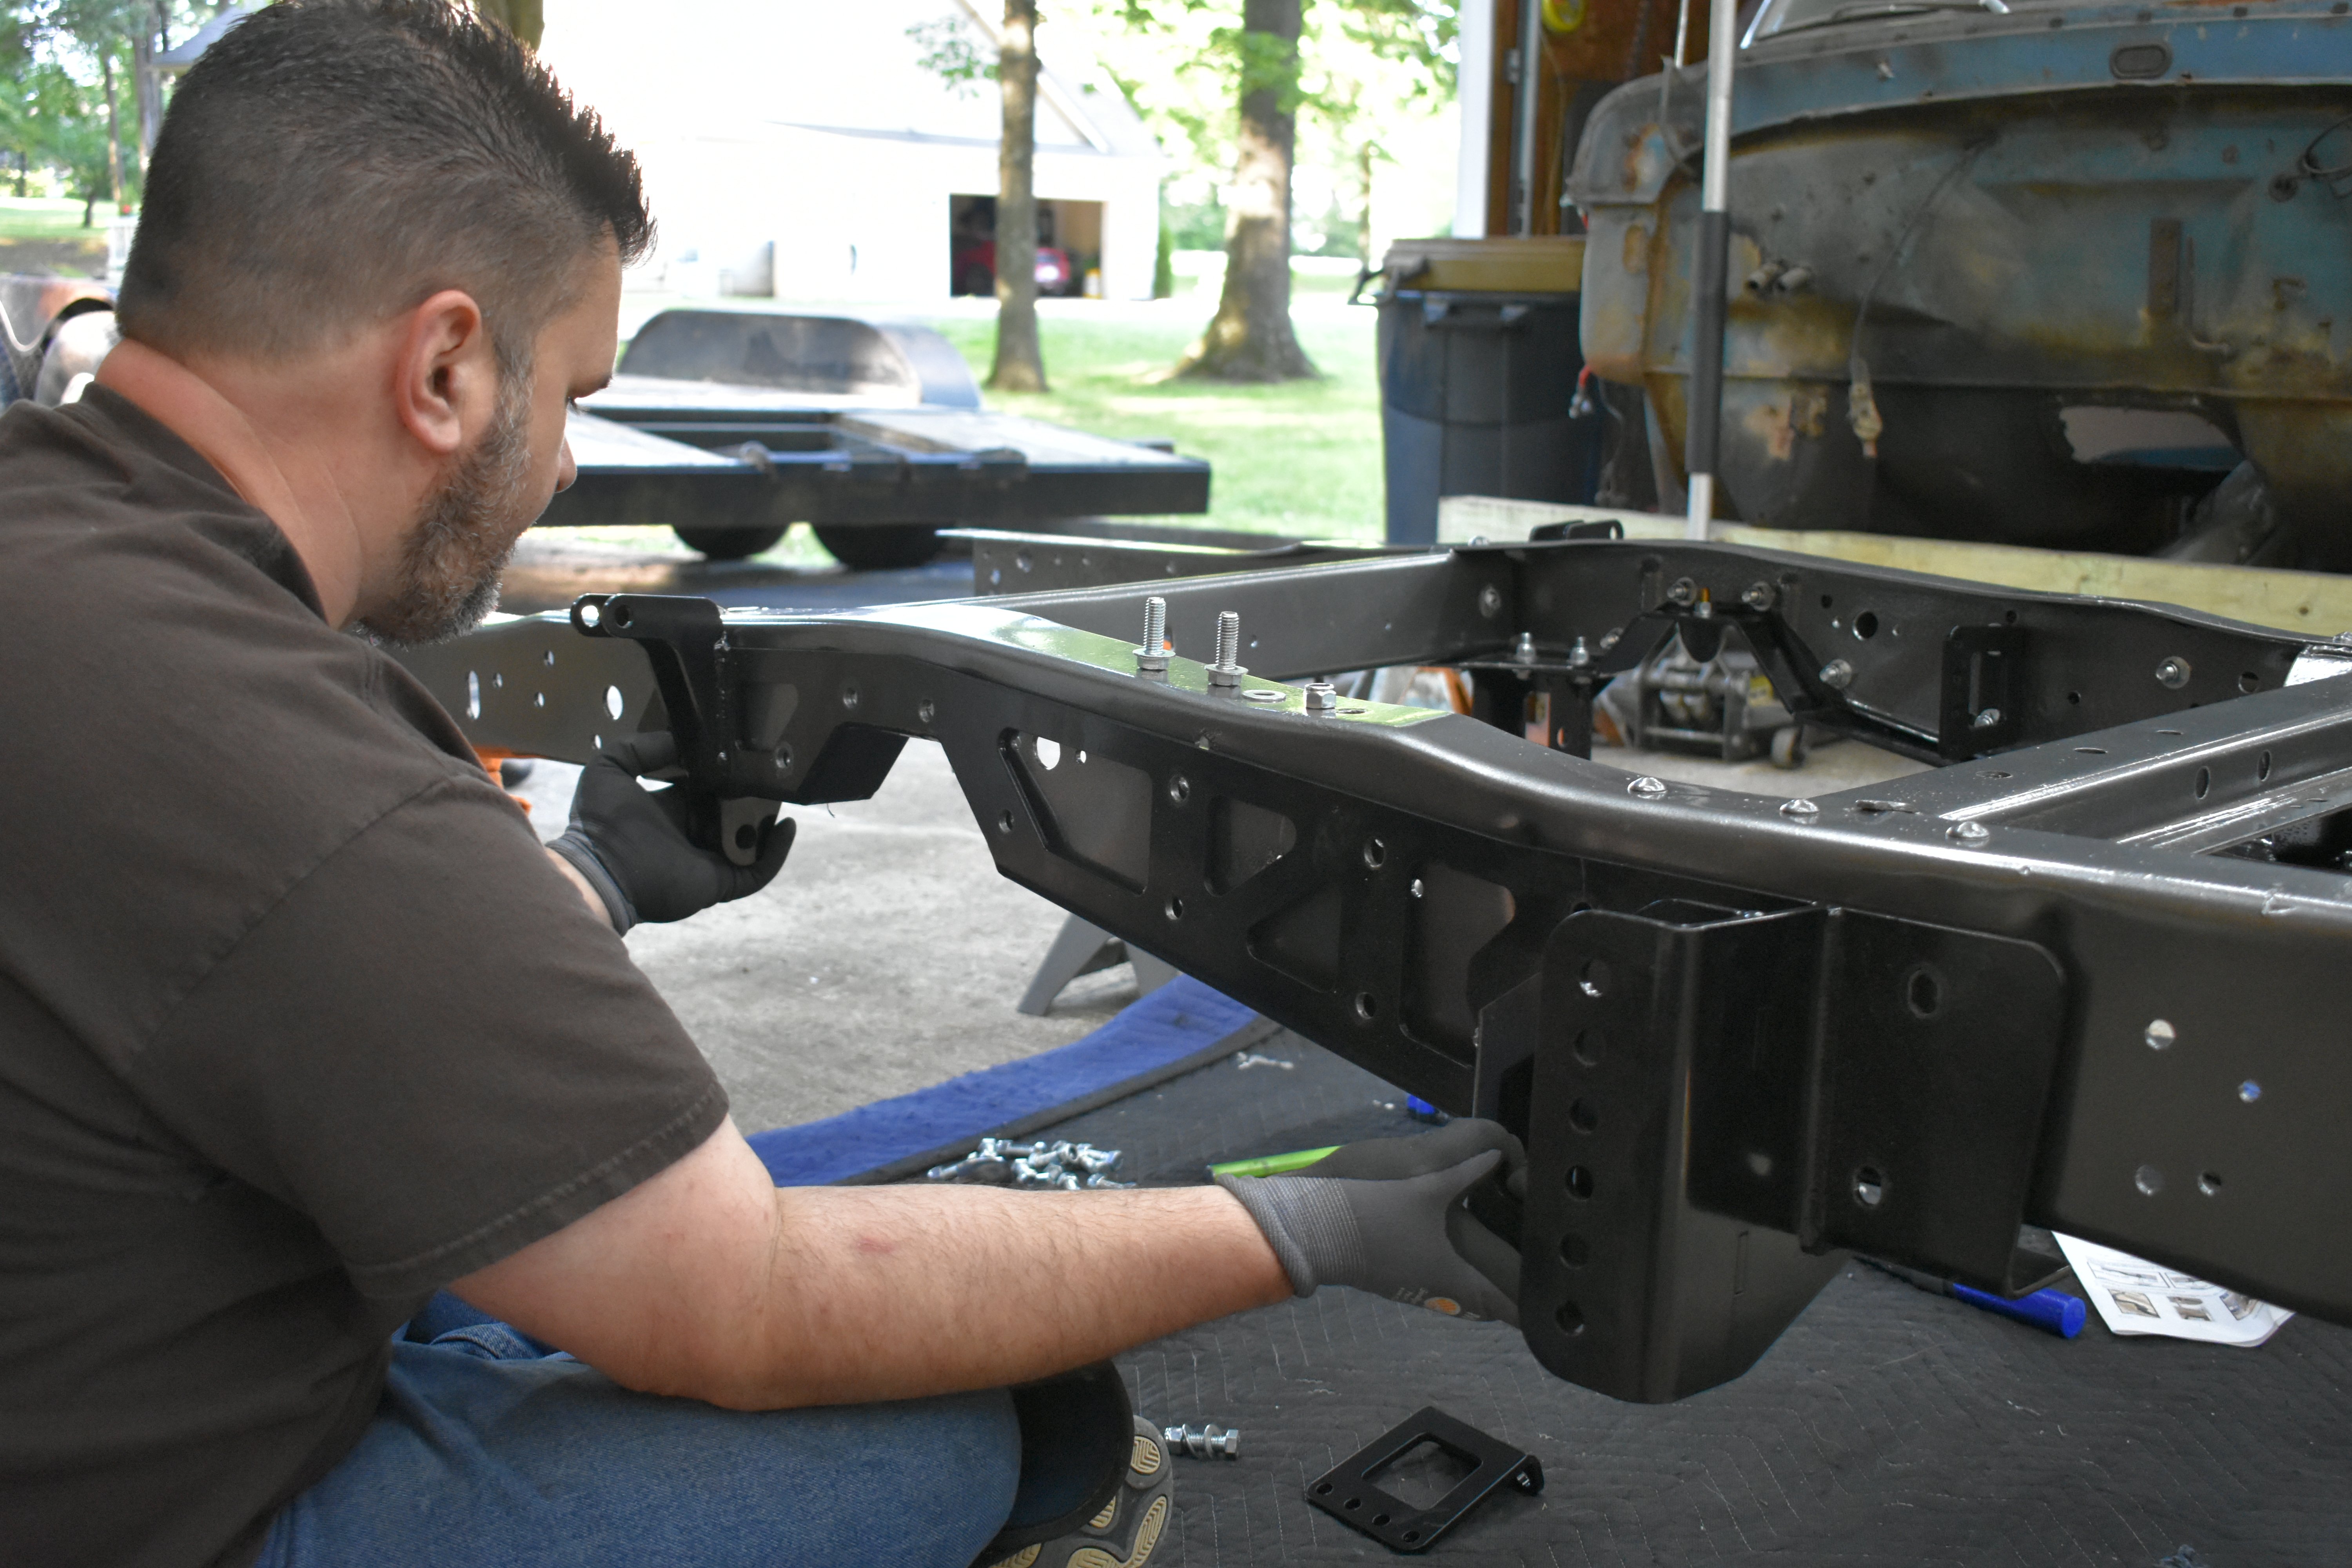
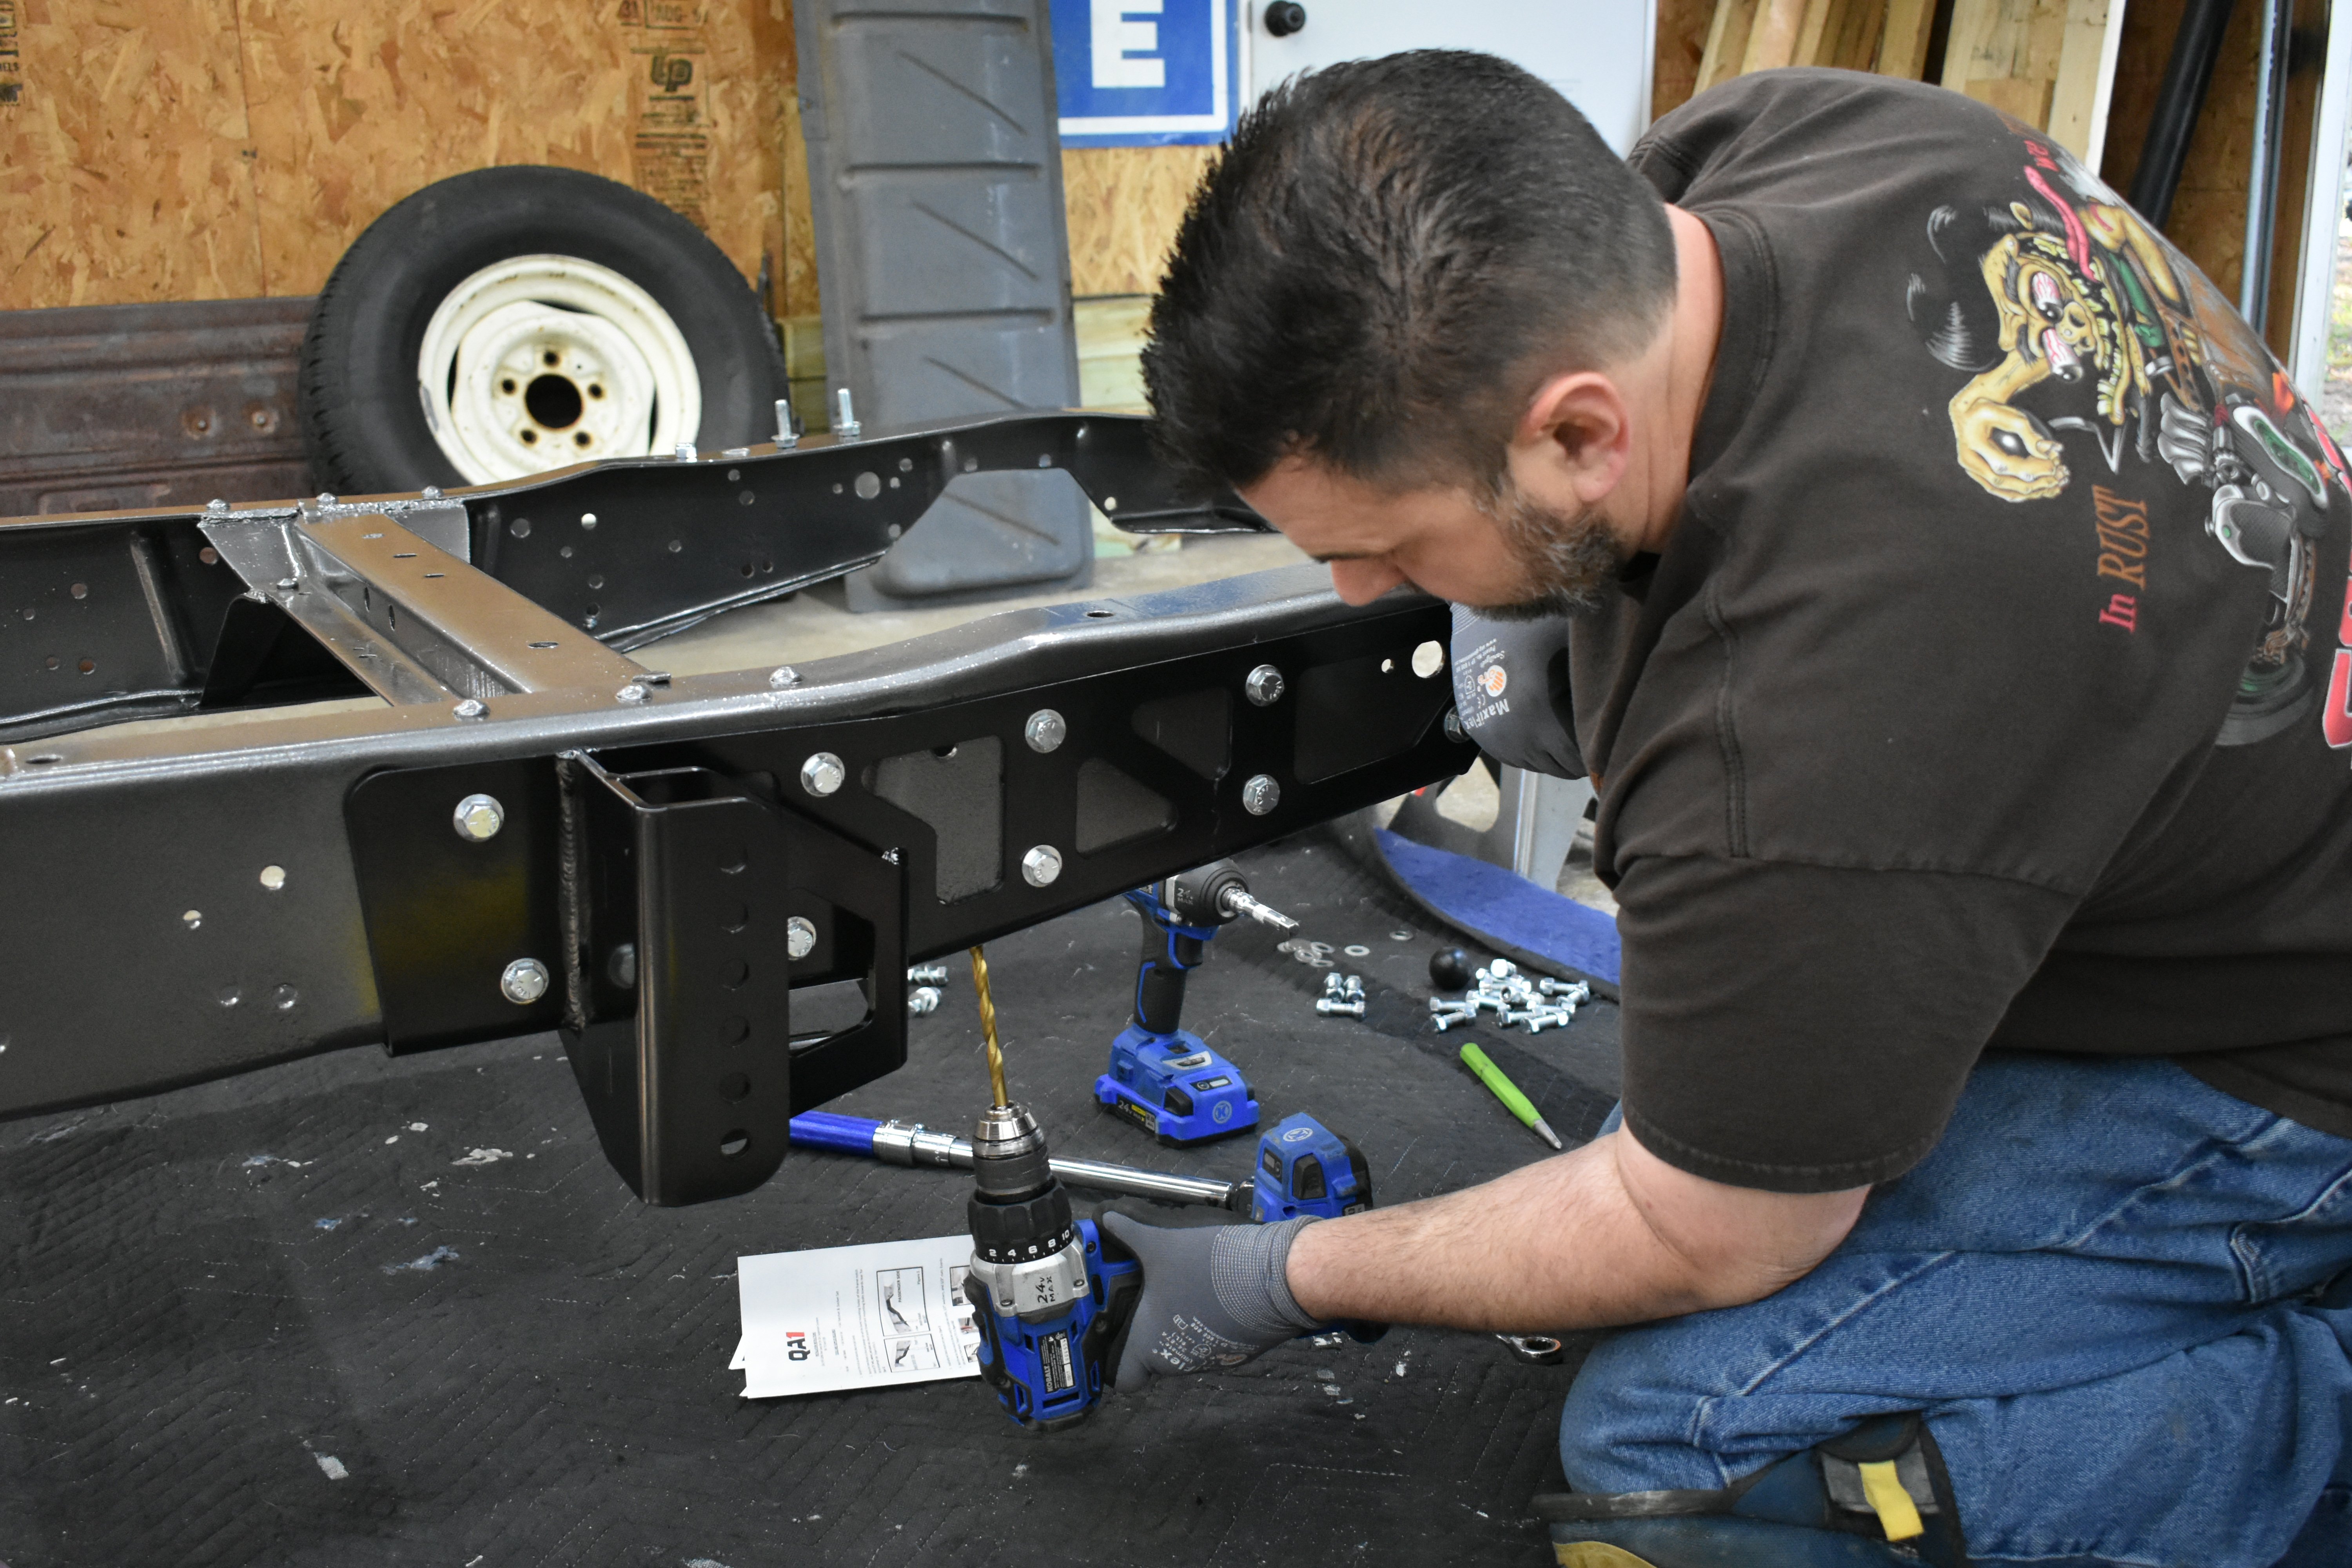
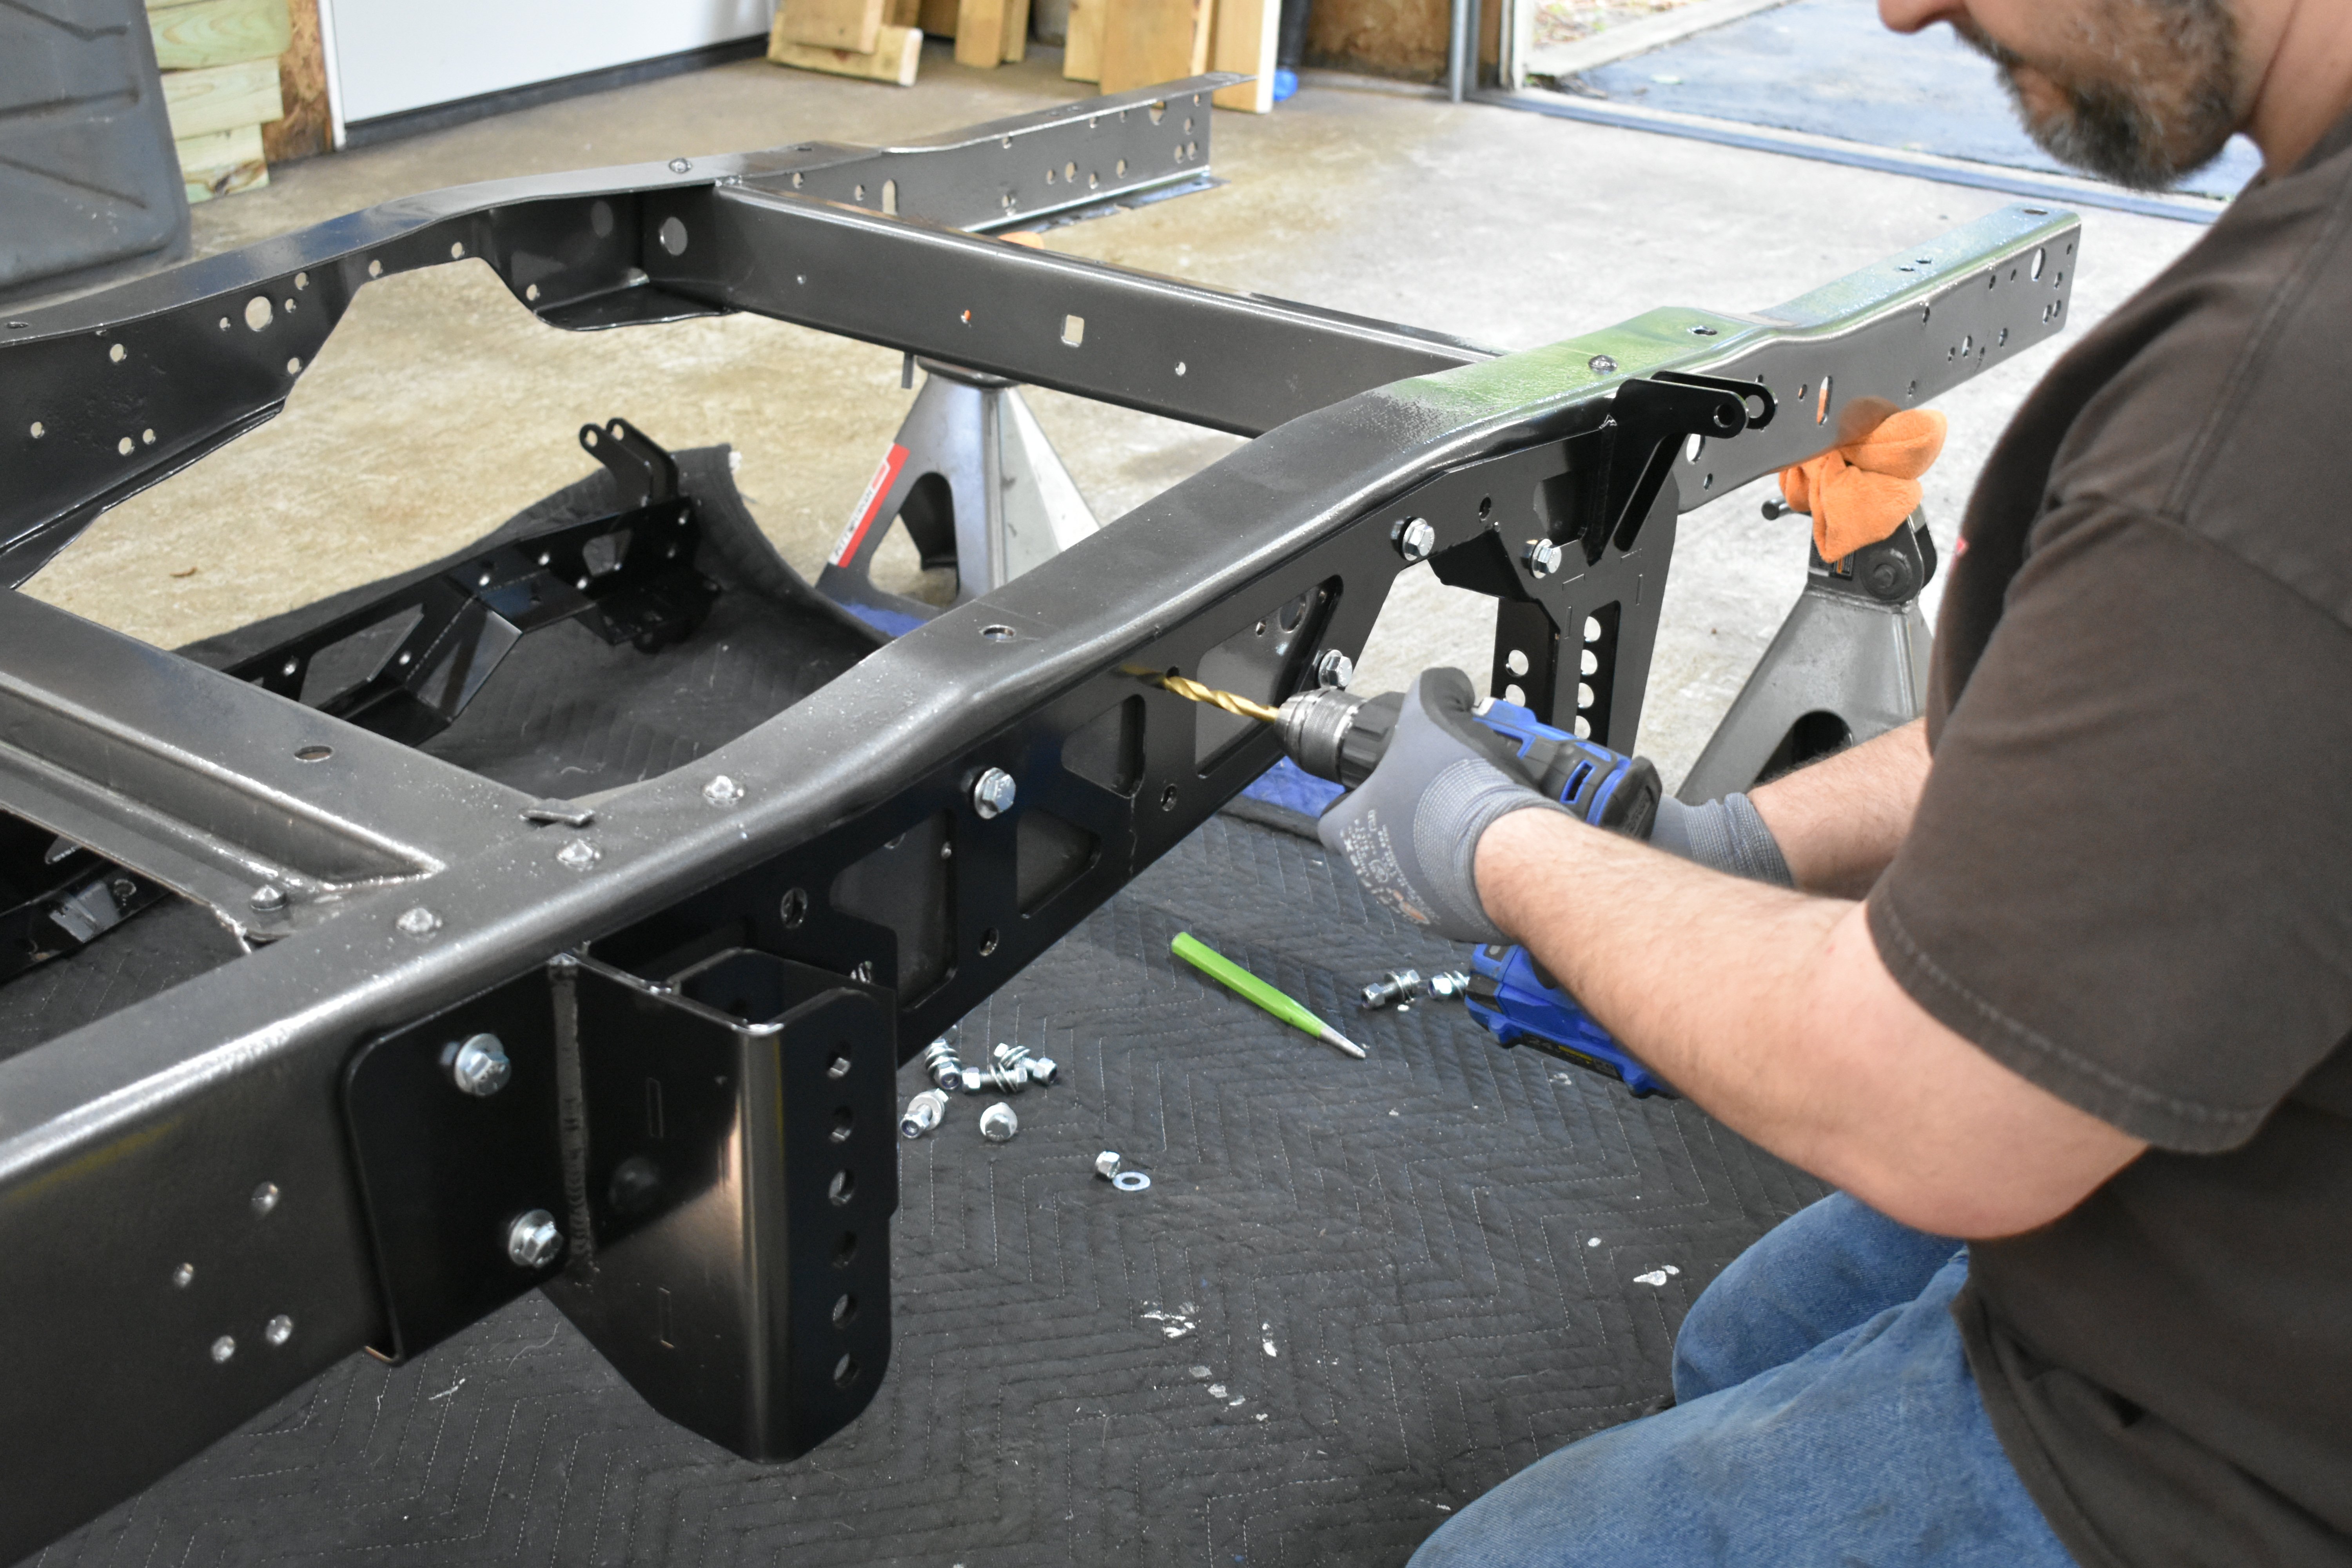
Cutting the C notch for the main mount.
Sway Bar Installation
The two existing frame holes were lined up with the two holes in the included notch template and attached.
Here, a friend of Ivan, Chris Johnston, is seen fitting the notch bracket and drilling the bottom and side holes.
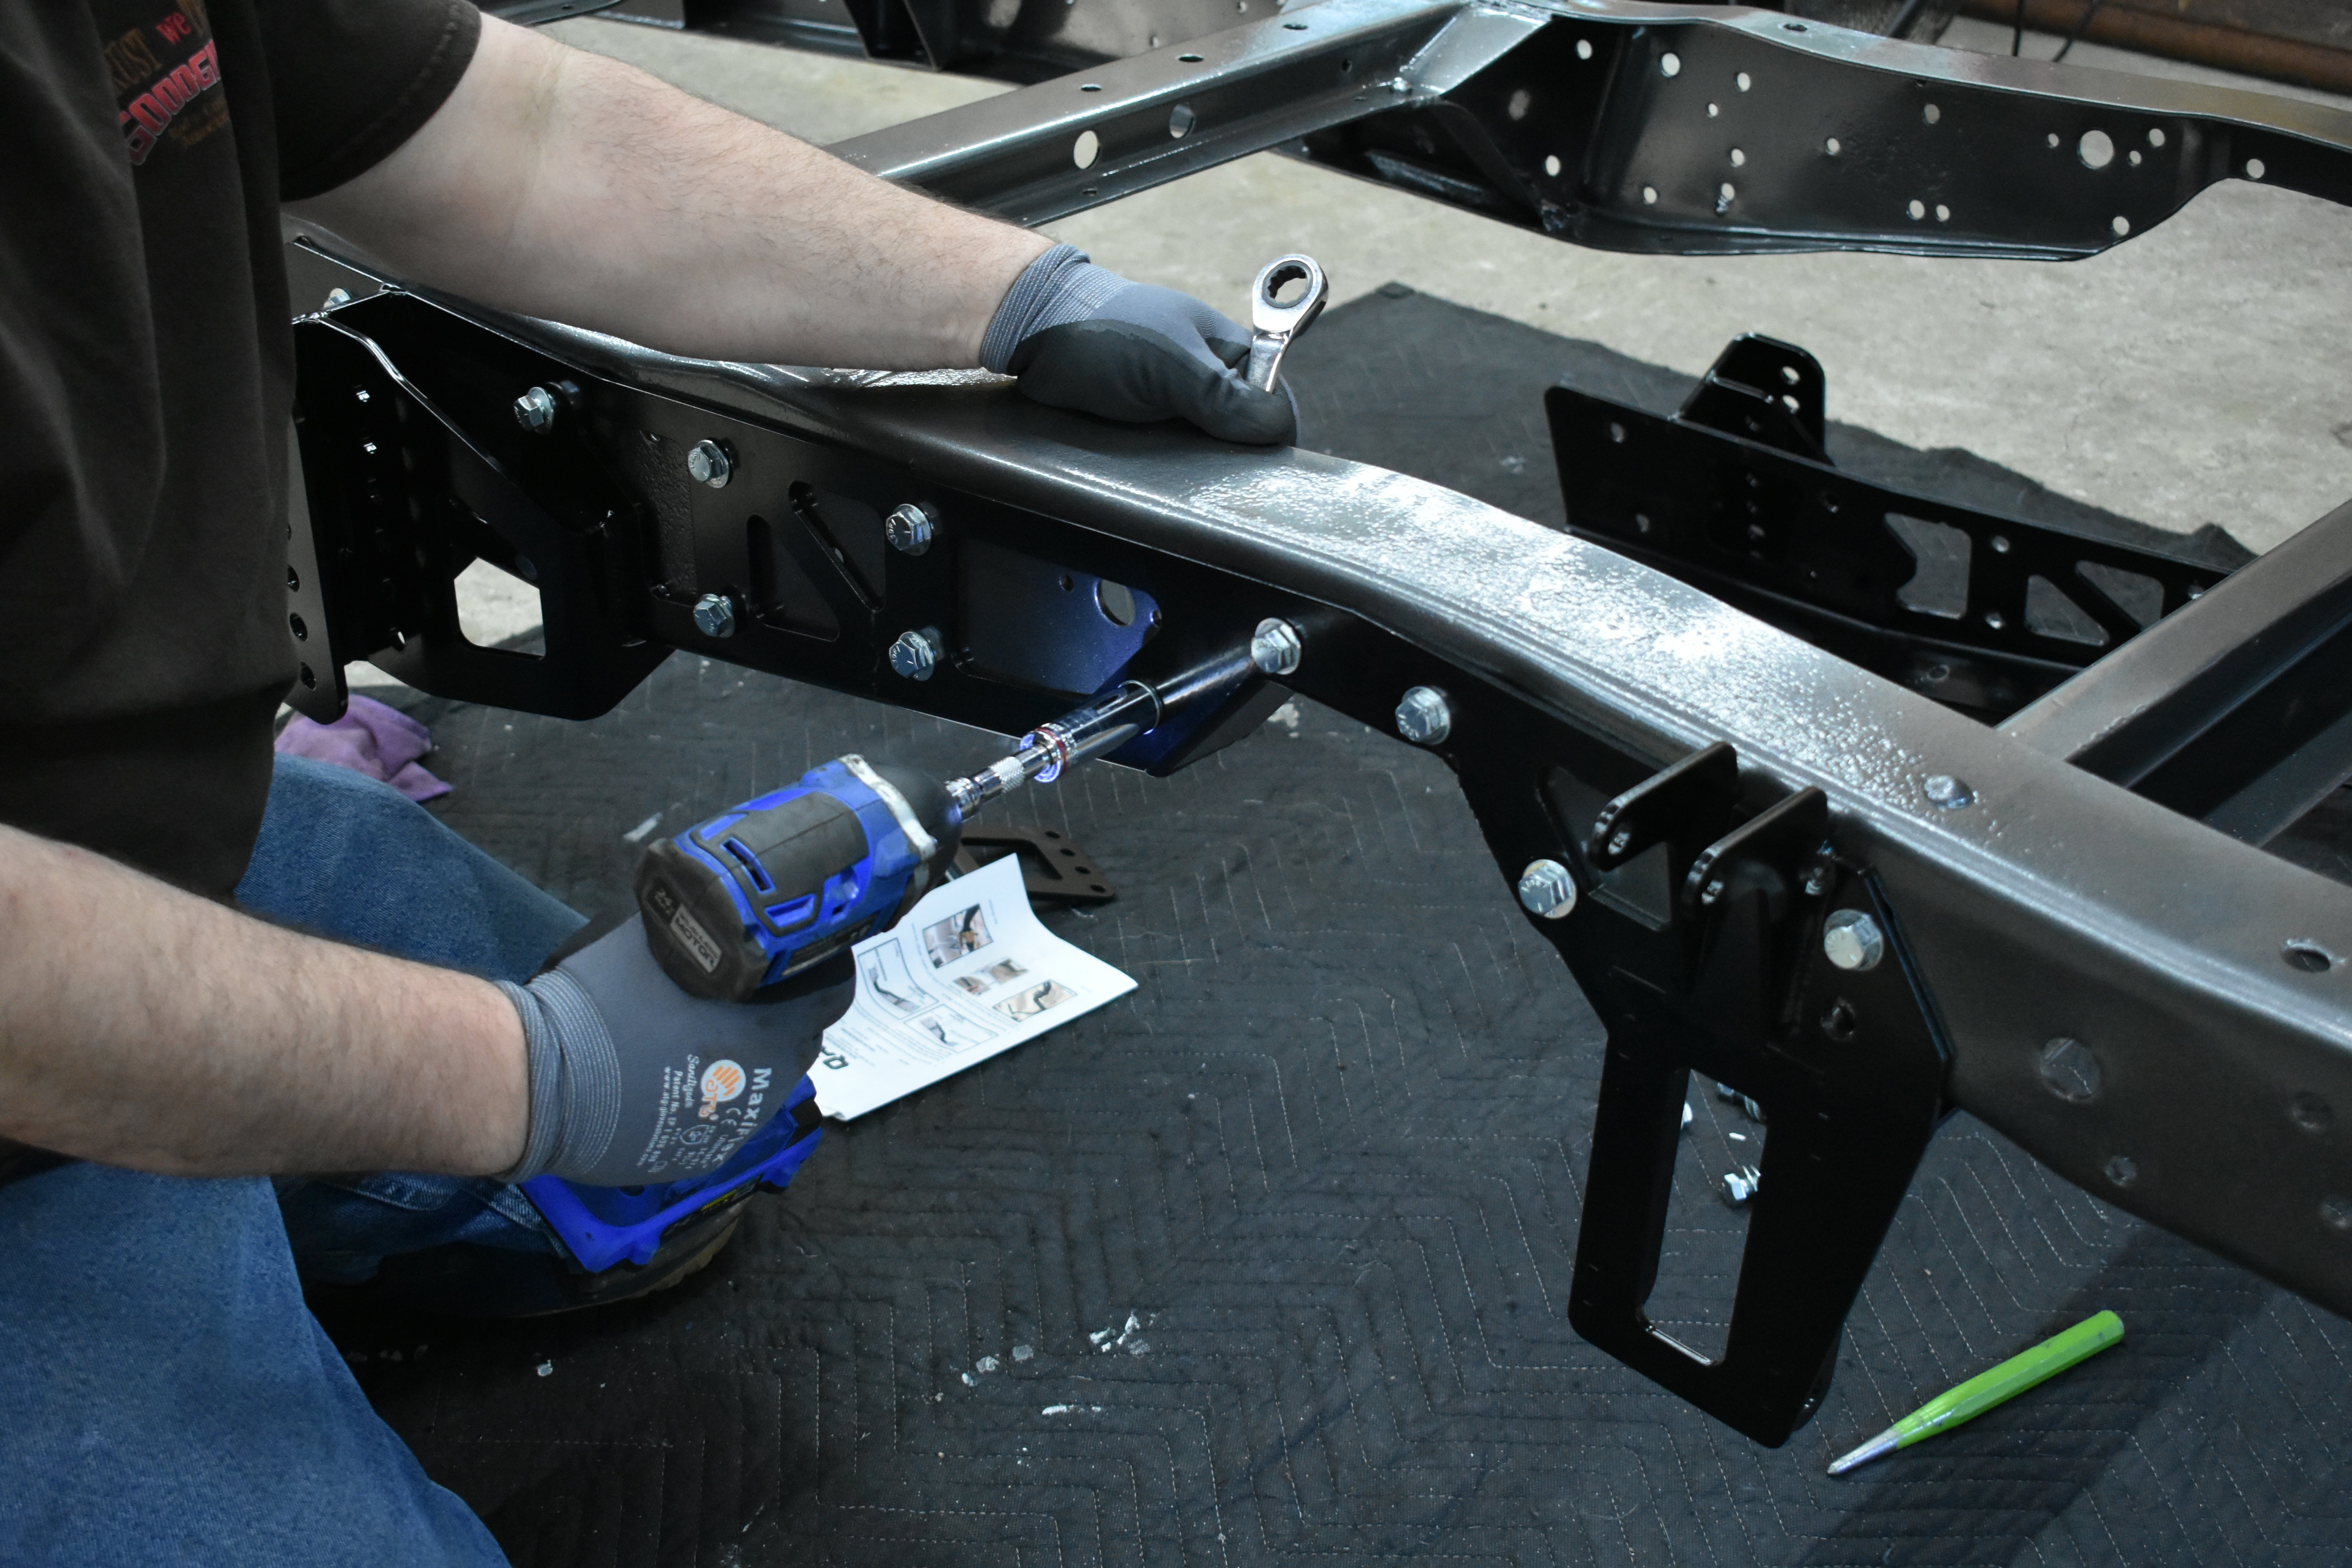
Inner frame brackets were mounted on both the driver and passenger sides and torqued to 49 ft-lb. Then, the bushings and chassis mounts were installed onto the sway bar, before the sway bar chassis mounts were mounted onto the axle. Special care was taken to evenly space the sway bar to the frame mounts before torquing to 70 ft-lb. Then, a right-hand jam nut was installed onto the right-hand thread rod ends before threading into the anodized red adjustment sleeve. This was repeated on the left-hand side. The rod ends were threaded all the way into the adjustment sleeve.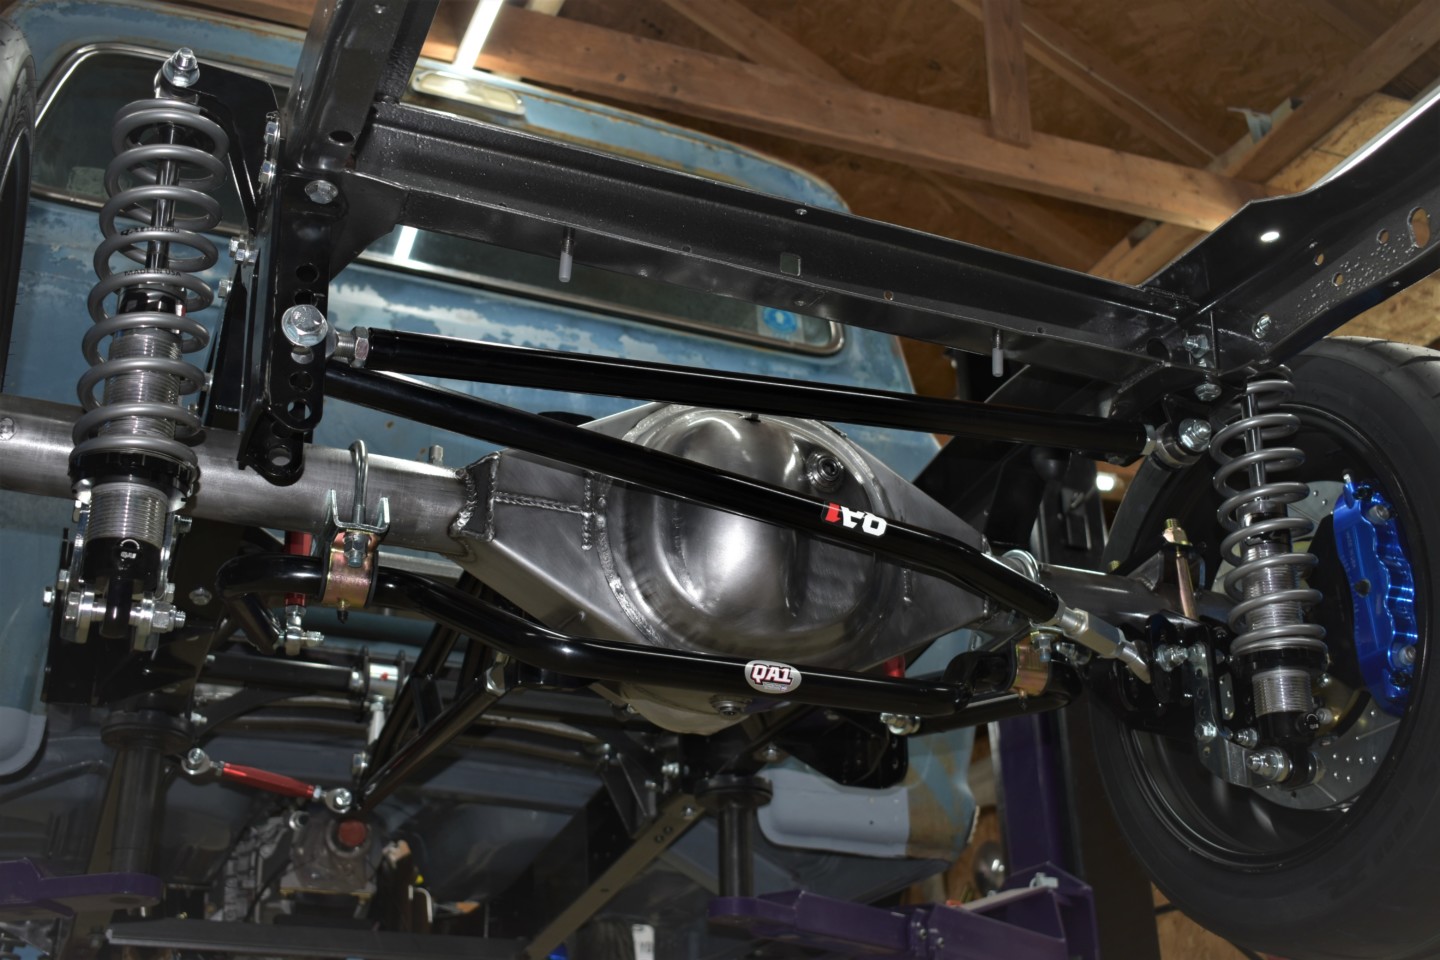
One of the assembled sleeves was then attached to the frame mount using a pair of high-misalignment spacers installed on the rod end and fastened to the frame mount. The sway bar link mounts to the rear of the mount using the third hole from the top as a starting point. Ivan attached the sway bar to the adjuster link using a high-misalignment stud, and torqued the connection to 31 ft-lb. Once final ride height is determined, the end links will be adjusted to ensure that the sway bar is parallel to the ground, and all jam nuts will be tightened to complete the sway bar installation.
Back to Business
The rod end with a jam nut was loosely screwed into the trailing arm as far as possible after applying anti-seize on the threads. Then, the bushing halves were inserted into the fixed rod end and the metal sleeve was pushed through the center. The fixed rod end was loosely screwed into the trailing arm as far as possible. You’ll want to ensure that there is an even amount of tread engagement for both rod ends and that they’re set center to center on the trailing arms to 20-inches before tightening the jam nuts to the trailing arm.
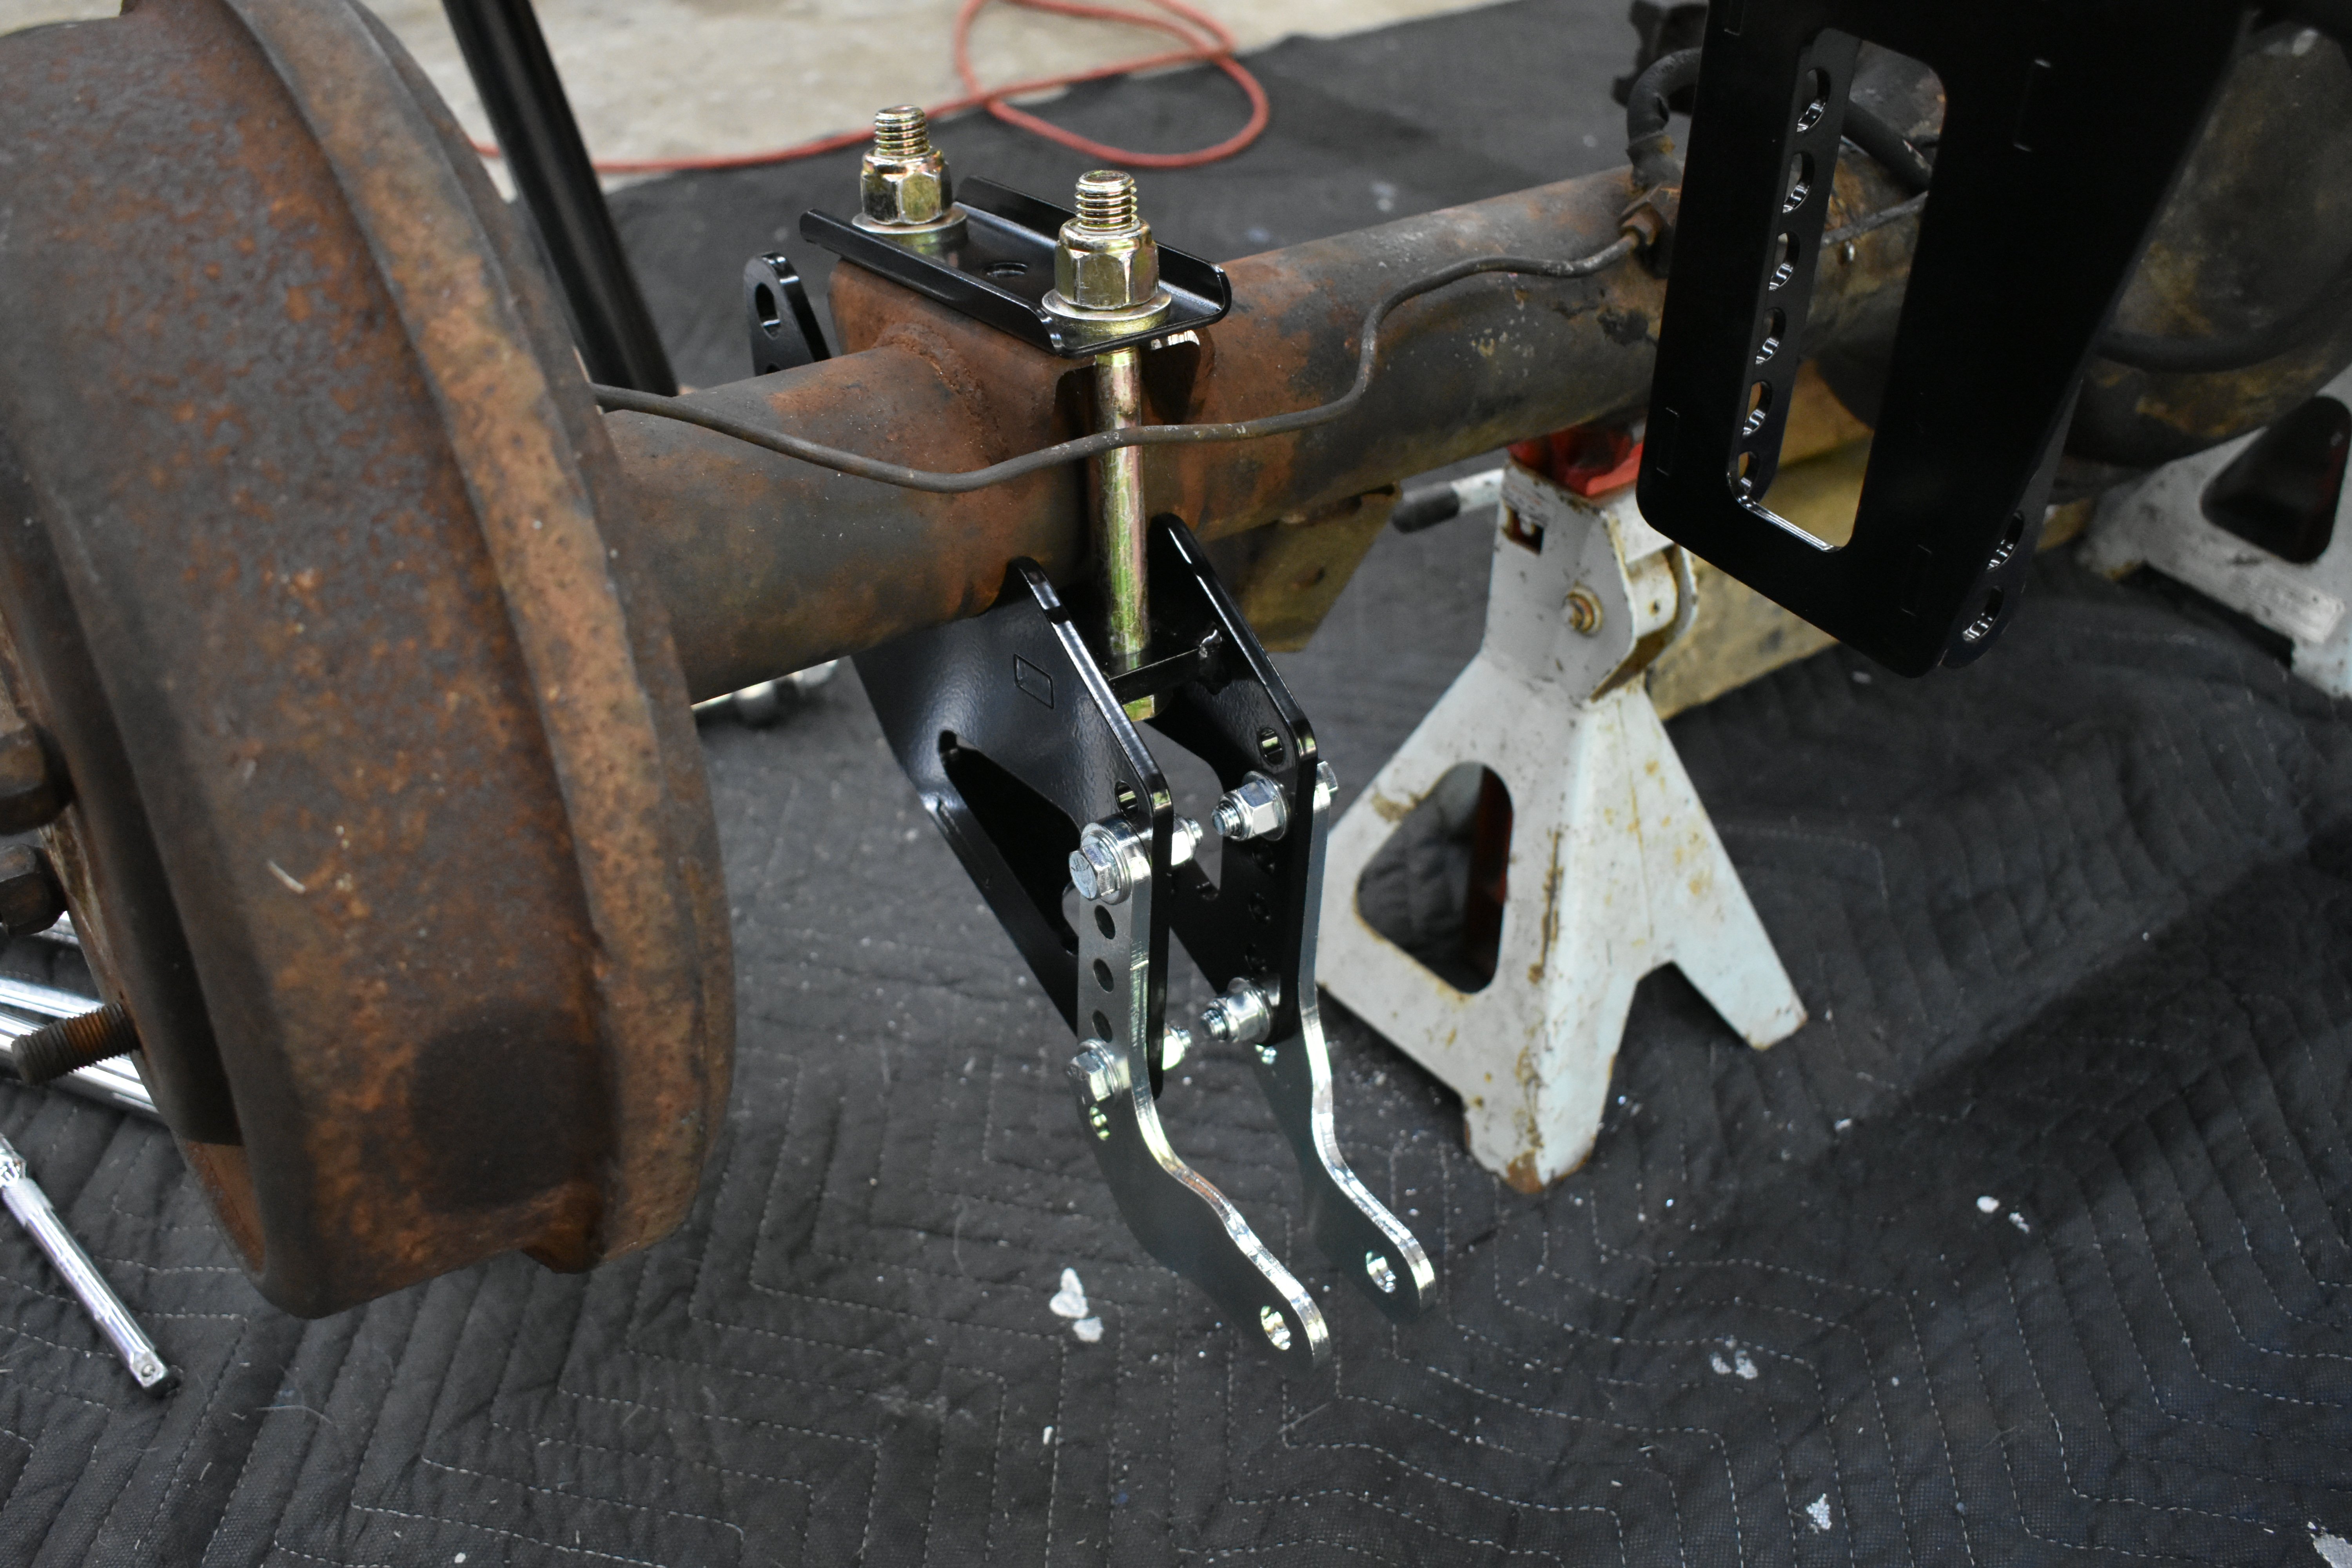
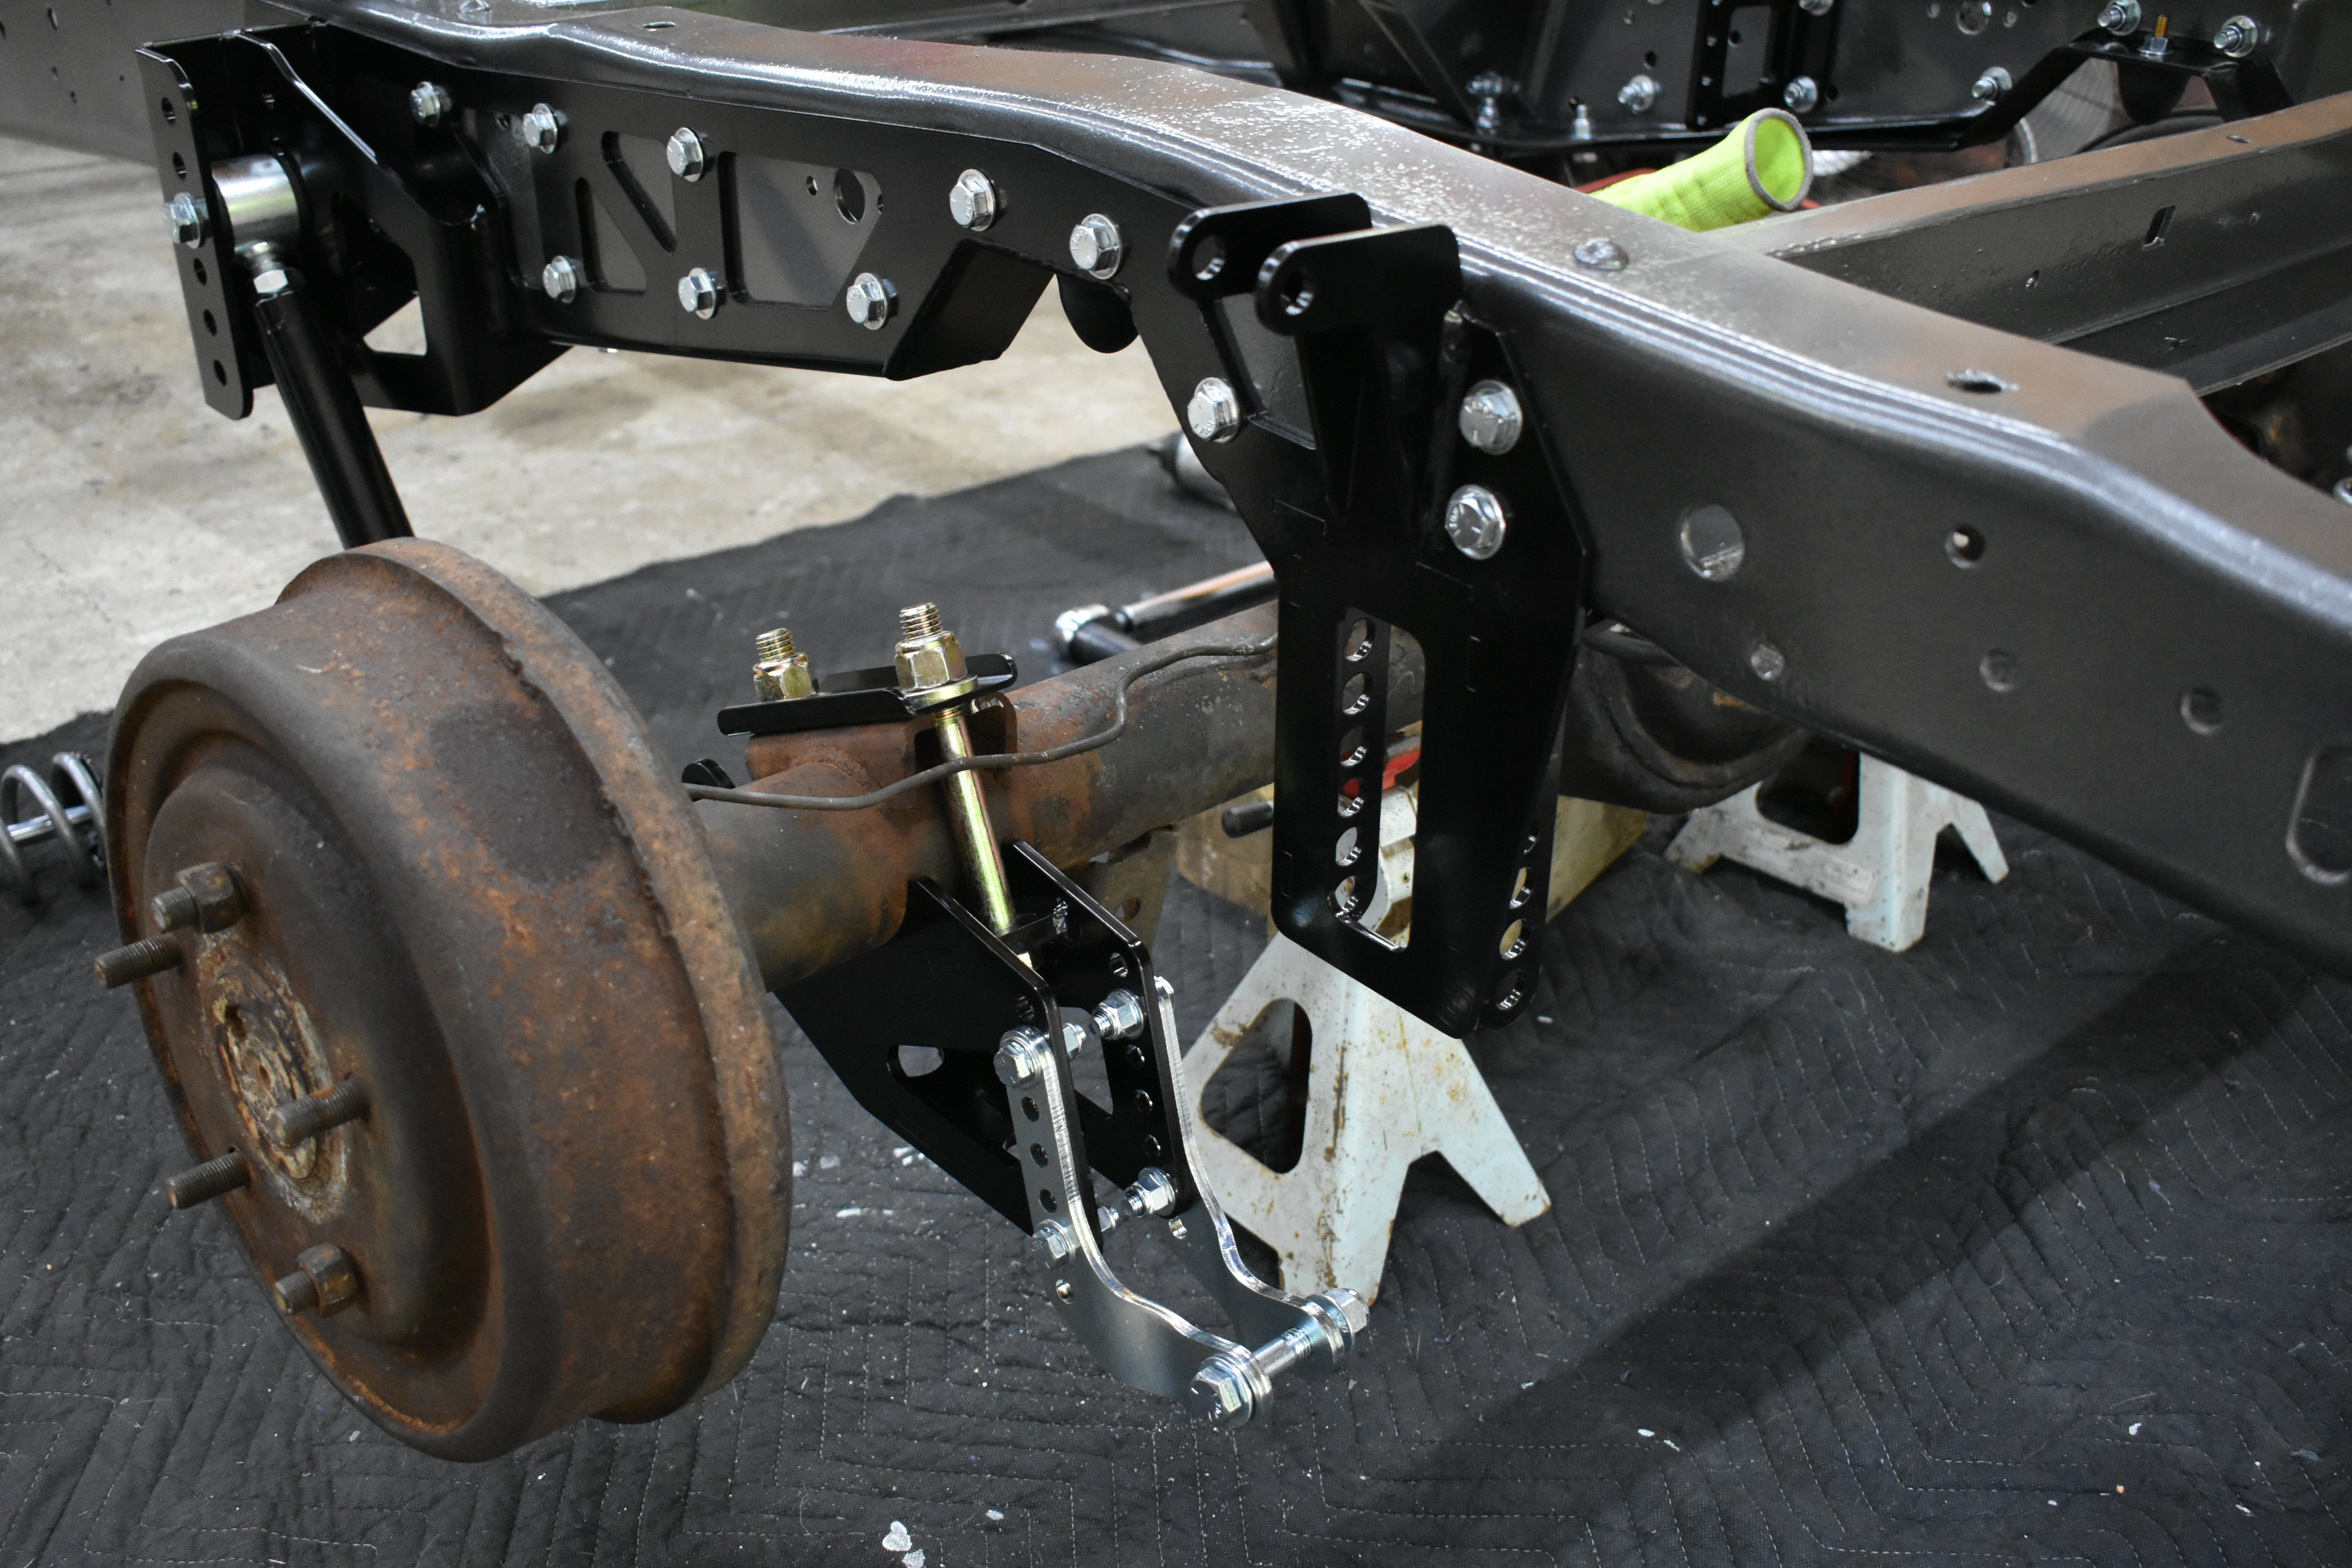
The bushing end of the trailing arm was installed into the third hole from the top of the notch bracket. The instant center can be changed by raising or lowering the trailing arm on the bracket can be adjusted when the final ride height is determined. The left and right axle mount brackets were mounted onto the axle and torqued to 90 lb-ft. Then, the left and right shock mount were installed onto each axle mount and torqued to 31 lb-ft.
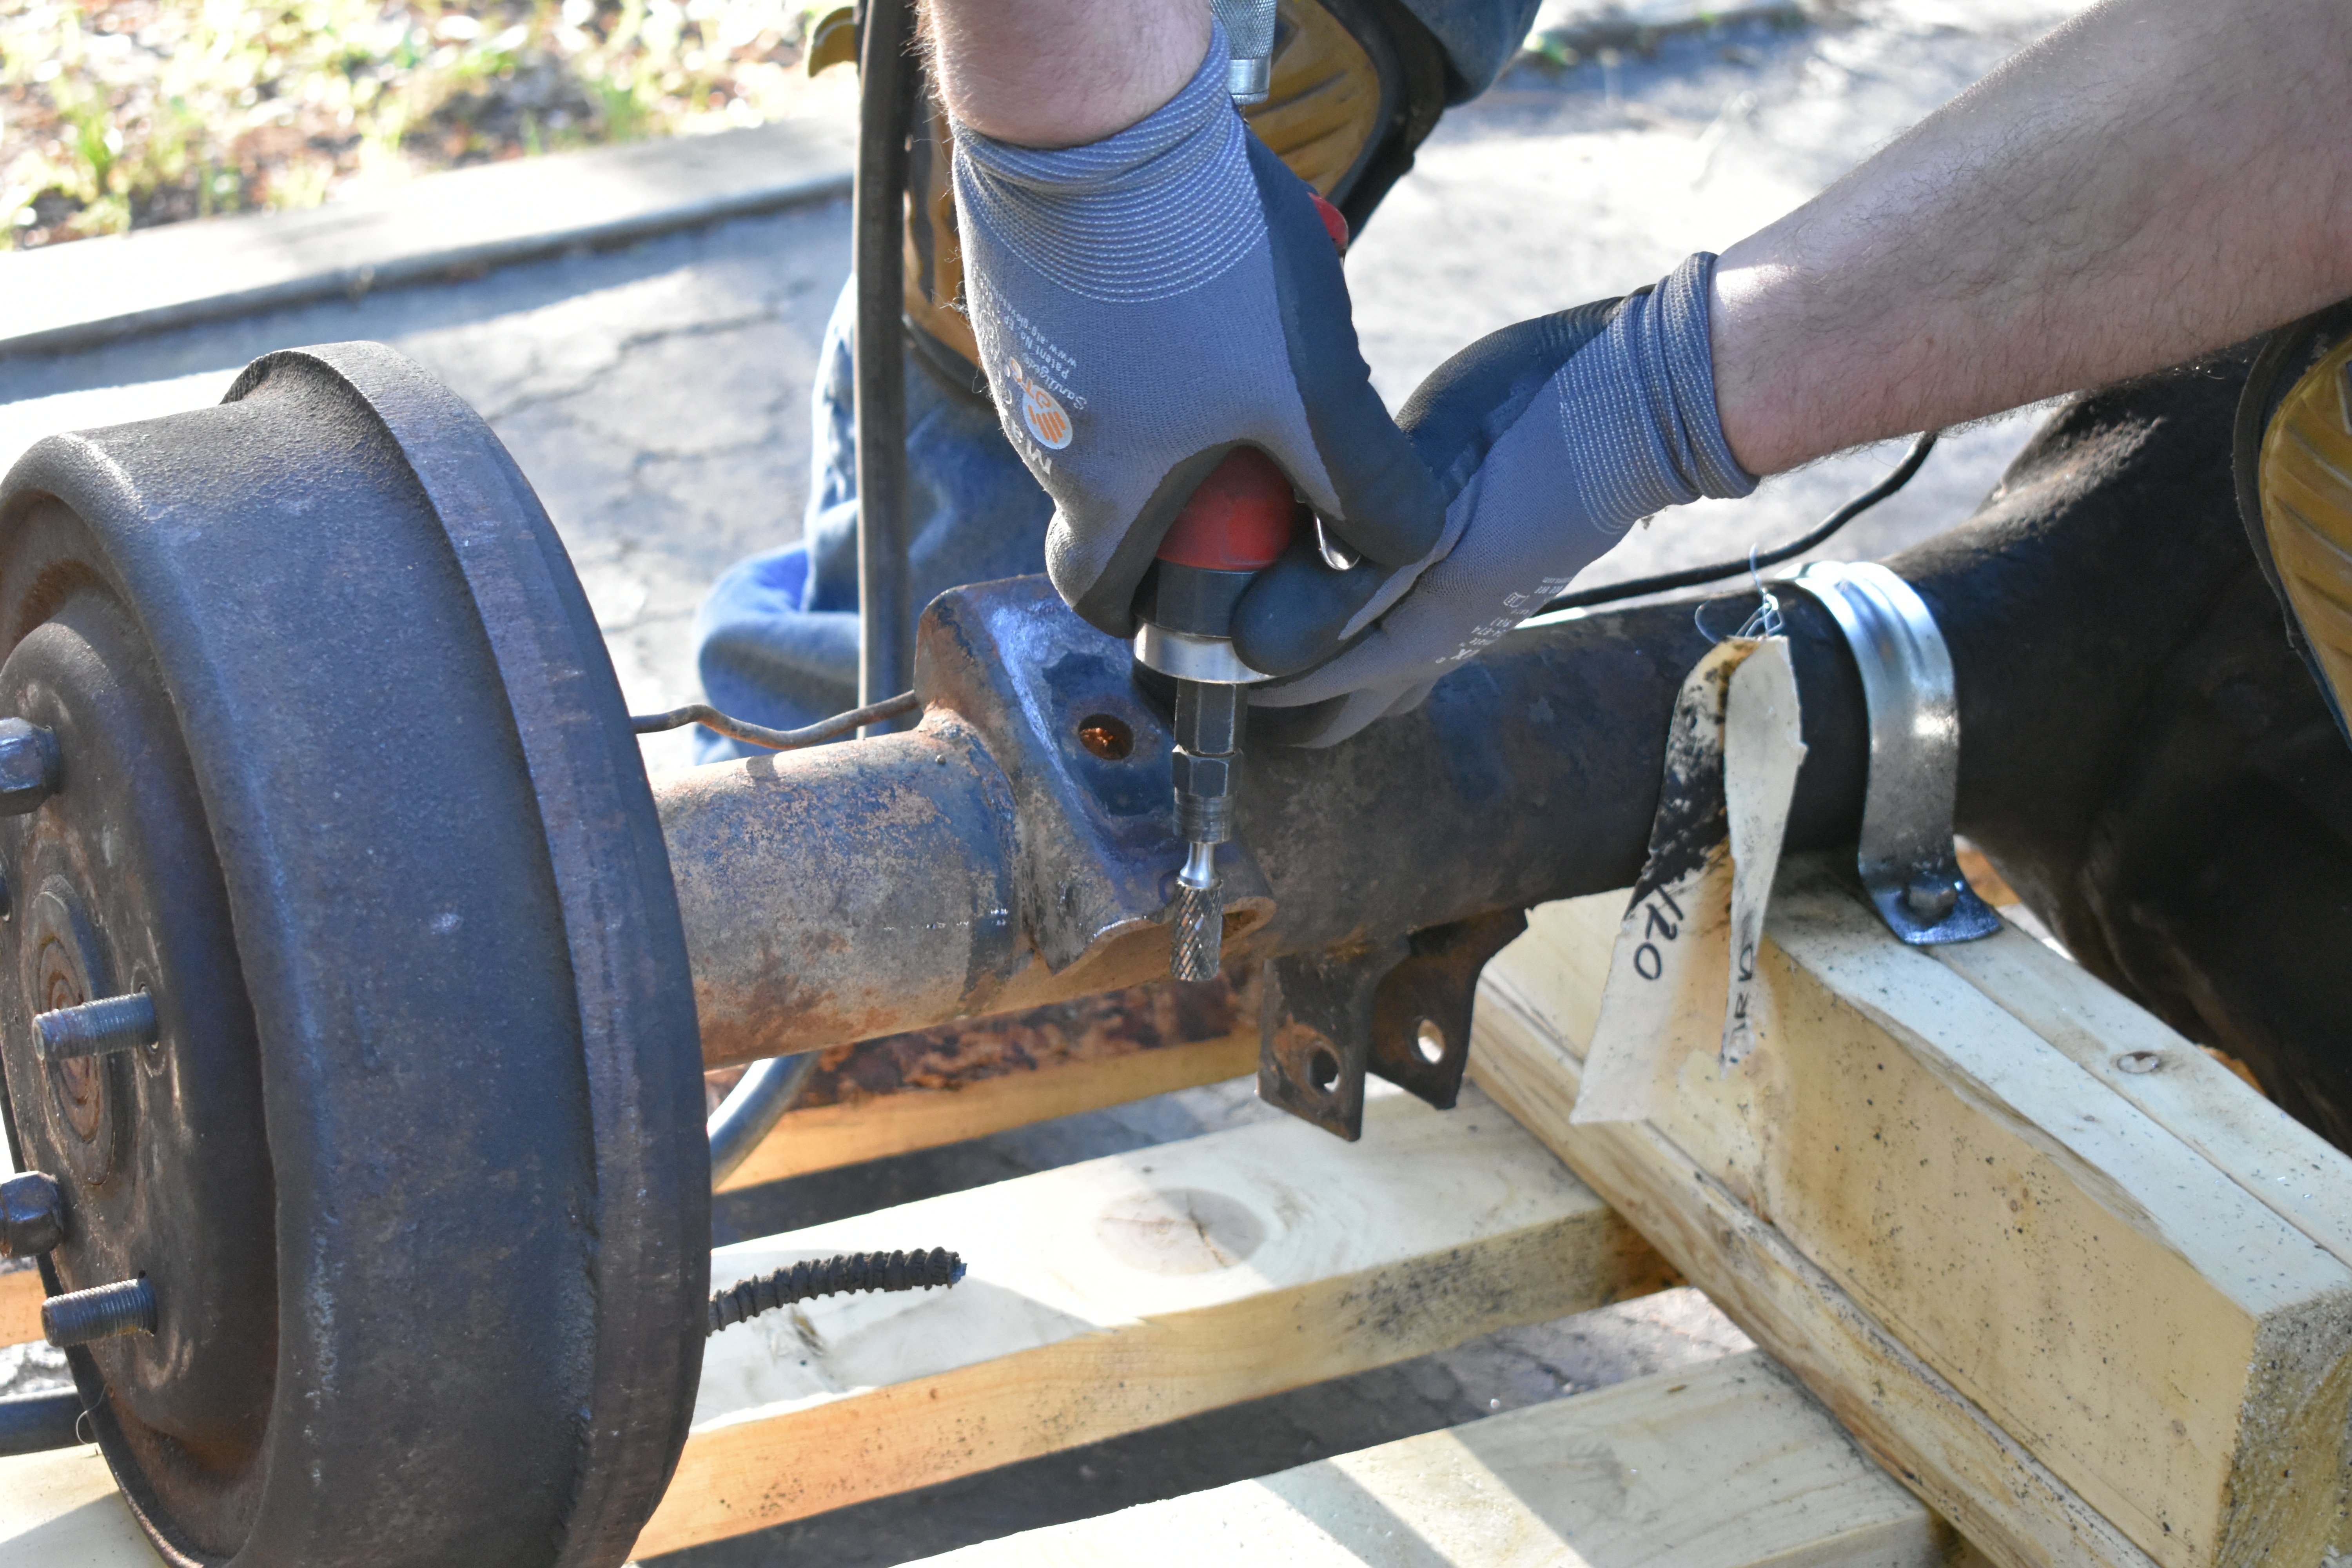
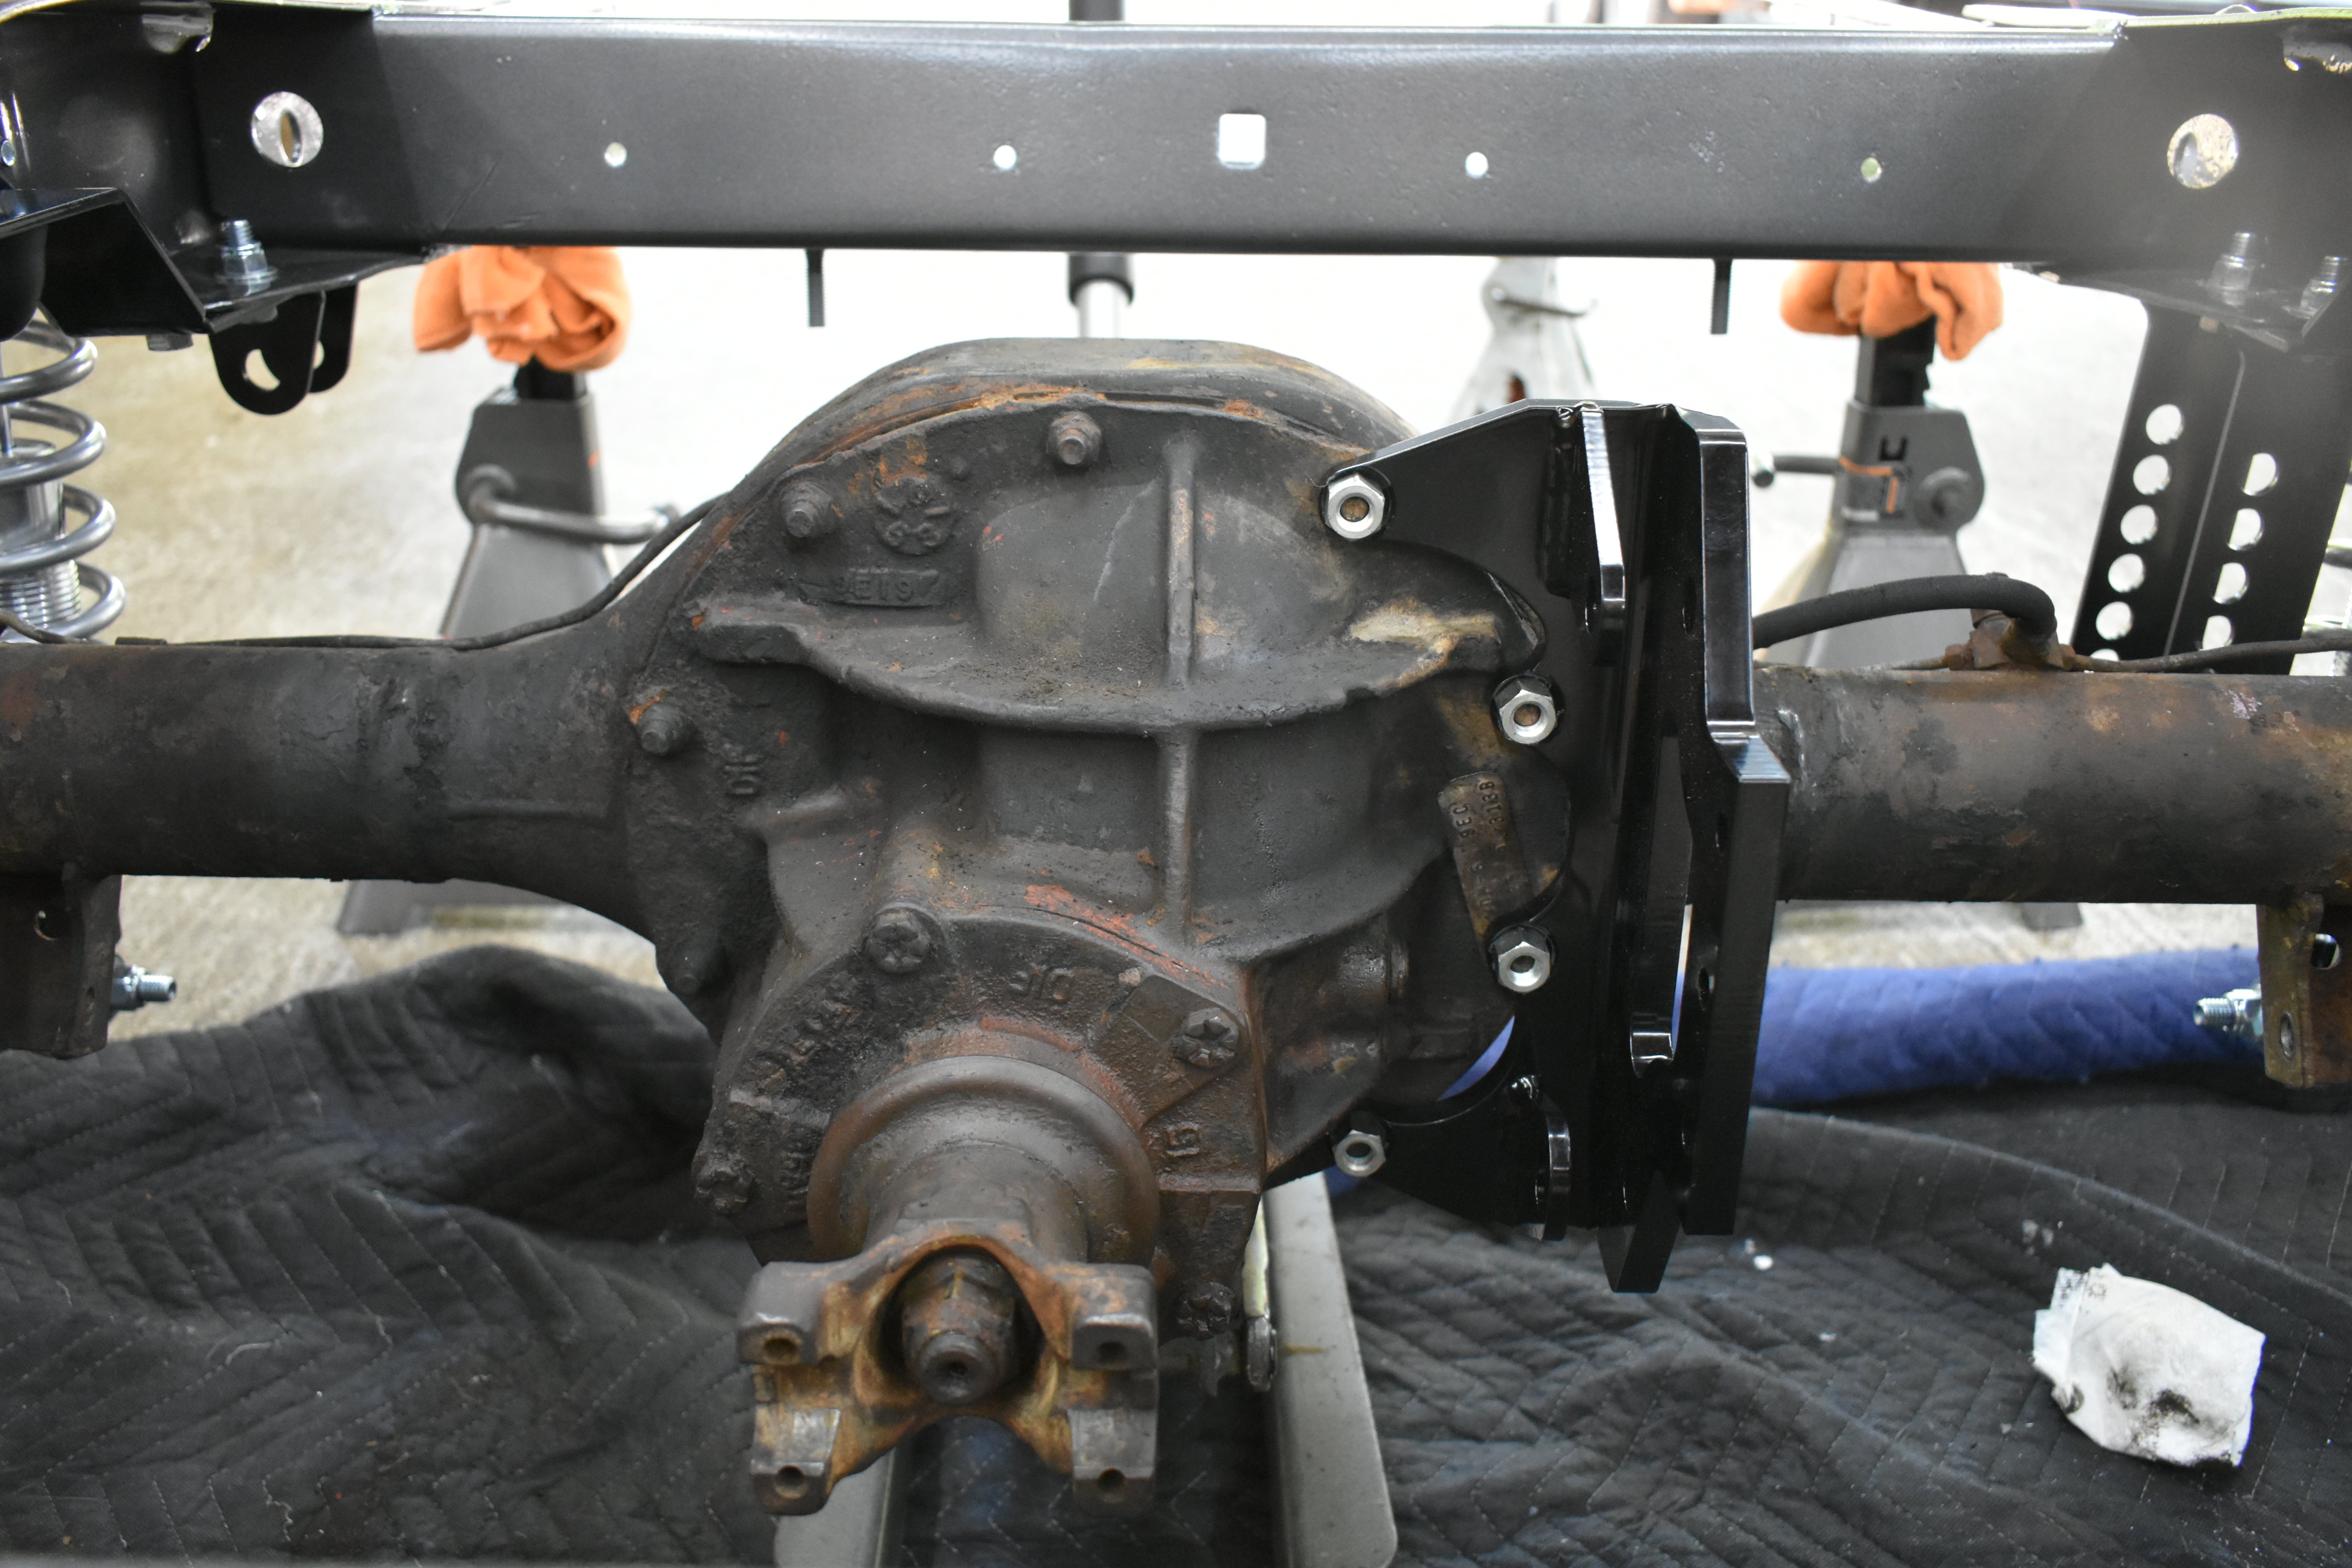
Marking and grinding the rear for the QA1 axle pad, followed by a picture of the leaf spring perch mount after the installation process. You'll note the condition of the rear end here. Have no fear! We're replacing that with a shiny new one from Strange (stay tuned), so we just used the one we had on-hand to mock it up.
The rear axle then needs to be prepped for mounting the QA1 axle pad to the leaf spring perch. The QA1 axle pad plate was placed on top of the axle leaf spring perch before the openings were marked and ground out.
The left and right axle mount brackets were then installed onto the axle and torqued to 90 lb-ft, before the left and right shock mount were installed onto each axle mount and torqued to 31 lb-ft.
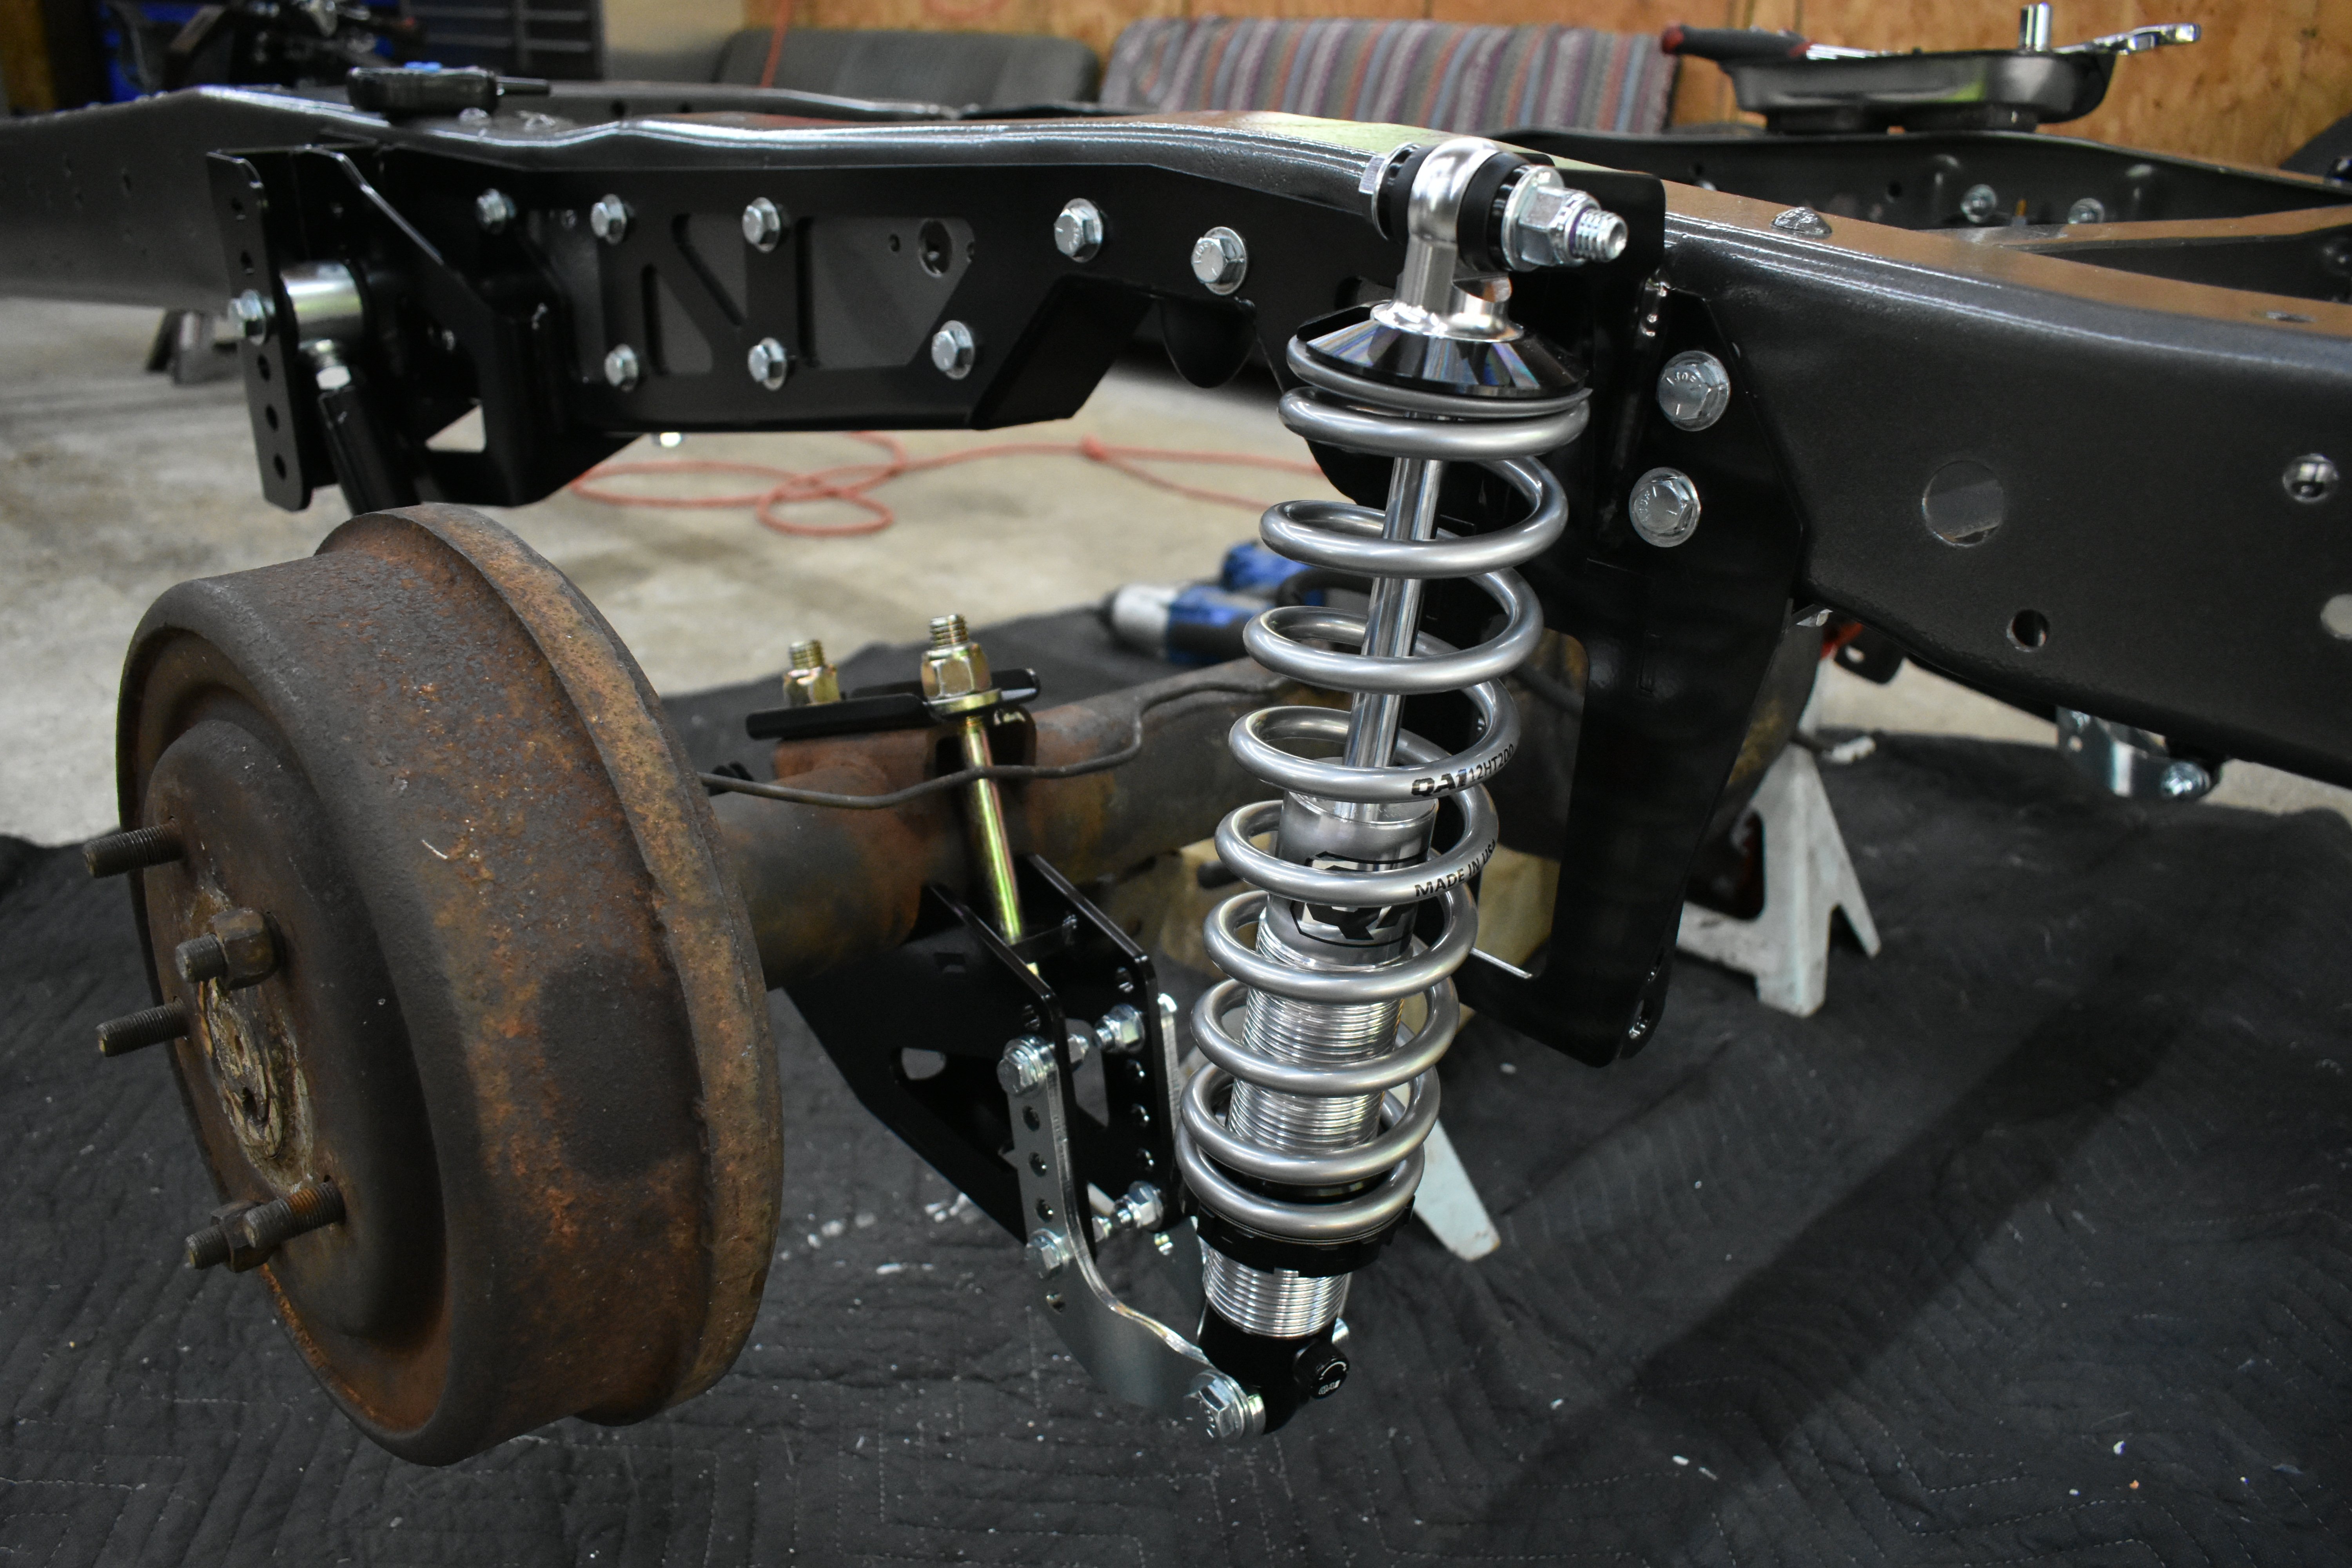
The axle was then positioned under the frame and the coilovers were connected to the notch bracket and axle mount.
Coilover Assembly
The coilover assembly was easy. Ivan began by threading the aluminum locking collar onto the shock, followed by the spring seat collar down to the bottom shock thread. The threads of the shock were then lubricated. Ivan opted to use the optional Thrust Bearing Kit from QA1 to help make adjustments easy, so he coated both sides of the washer with lubricant and installed the stainless steel spring seat washer followed by the bearing and second washer.
[group_caption caption="" type="2" images="https://www.speednik.com/image/2020/10/project-f-word-receives-a-bolt-in-qa1-suspension-part-2-2020-10-30_17-28-42_656206.jpg, https://www.speednik.com/image/2020/10/project-f-word-receives-a-bolt-in-qa1-suspension-part-2-2020-10-30_17-28-33_083116.jpg"]
Then, the piston rod was pulled out to its extended position and the spring was slid over the shock down to the spring seat adjuster, before installing the spring cap. Then, the spring seat collar was turned up to take out the slack in the spring/seat prior to installation.
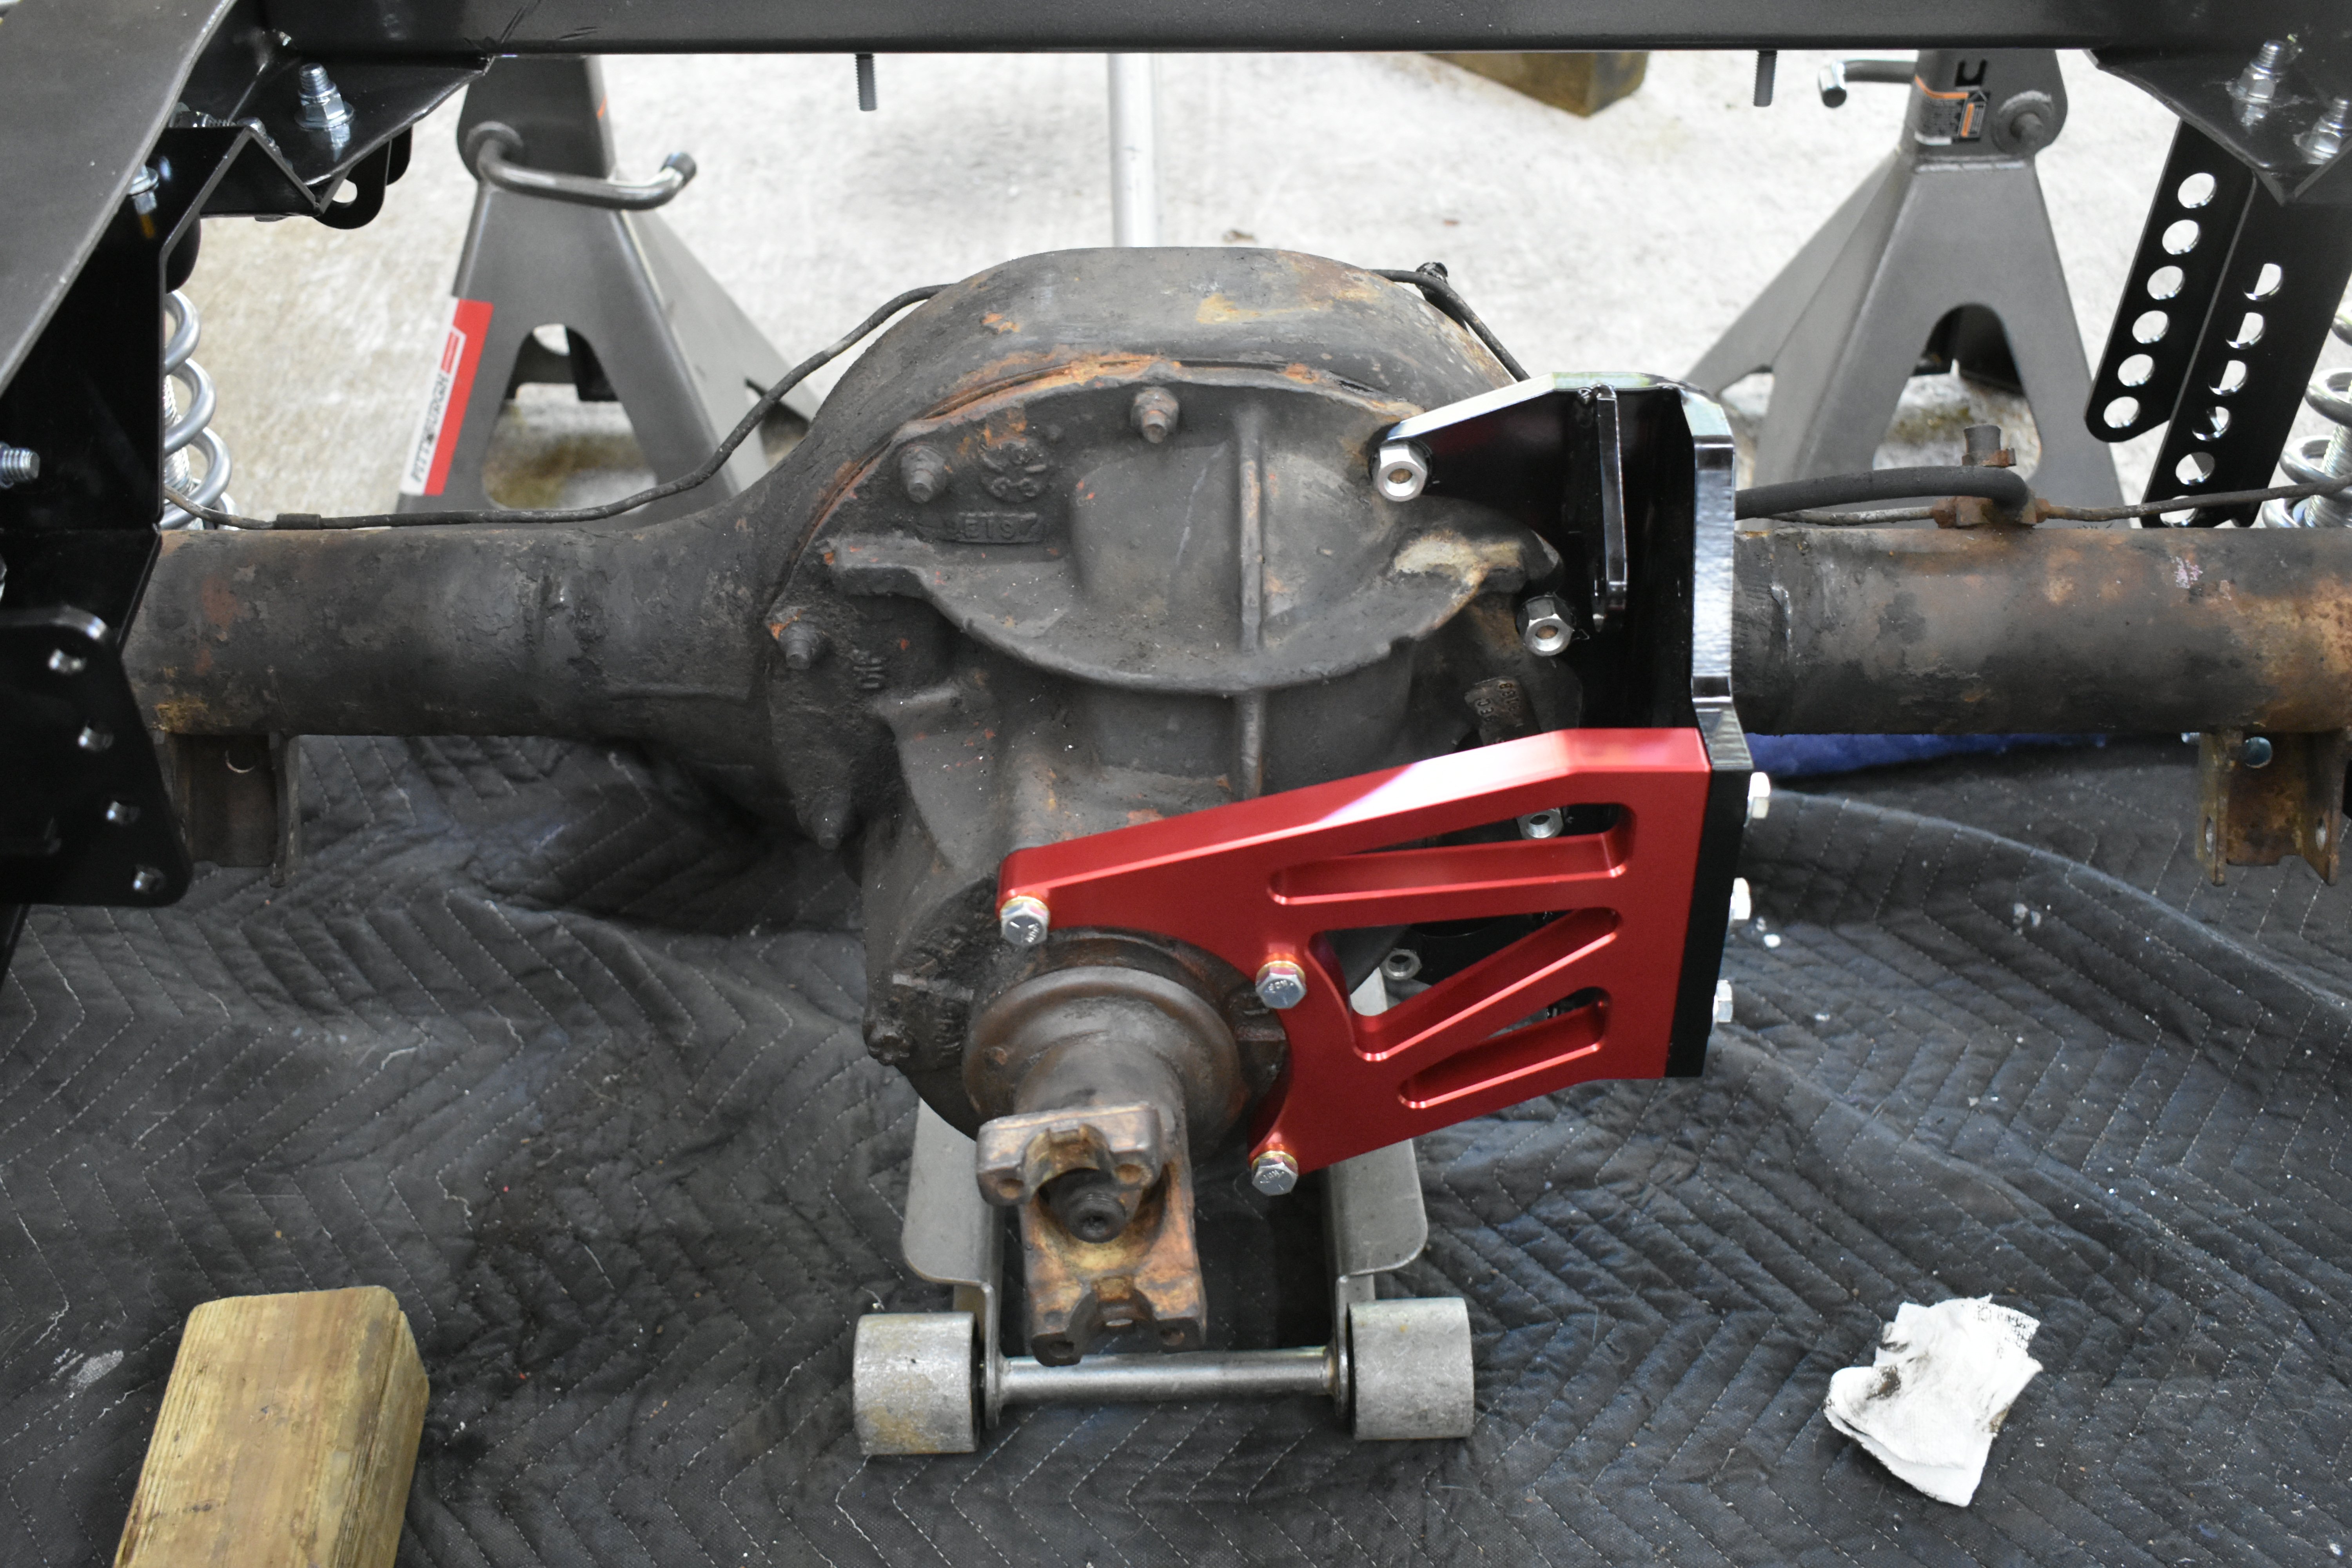
With the axle supported under the frame, the trailing arm was connected to the center hole in the axle bracket. The torque arm bracket was then mounted to the differential by removing the four driver’s side nuts from the front of the differential, and using shouldered nuts, torquing to 37 ft-lb.
The rod end was installed with a jam nut into the rear upper connection of the torque arm, screwing it in fully. The male-to-female linkage adjuster was installed with the left-hand jam nut in the lower torque arm connection before threading the existing rod end with the jam nut. The linkage adjuster will operate as the pinion angle adjuster.
Installation of the coilovers.
The rear torque arm connection was then attached to the inside of the torque arm bracket with a spacer, with the small diameter facing toward the torque arm. Two bushing halves and a 5/8-inch sleeve were installed into the large rod eye assembly for the front torque arm assembly.
A jam nut was installed onto the large rod eye, followed by the female rod end, and the assembled rod eye was then installed into the front torque arm connection. Then, a right-hand threaded jam nut was installed onto the rod end, before the rod end was screwed into the right-hand threaded red aluminum adjuster sleeve. The left hand rod end was then installed with the left-hand jam nut into the left-hand threaded end of the adjuster sleeve.
The assembled adjuster sleeve was installed into the front side bracket of the torque arm, with two high misalignment spacers installed on both sides of the rod end.
The anodized red front pinion mount was installed onto the torque arm bracket, and then bolted to the differential. Then, the front crossmember frame plates were set on the frame, approximately ten inches from the center of the rivet. The crossmember was raised into place, and the frame brackets were loosely bolted to the front crossmember. The torque arm front connection was then bolted to the center mounting hole of the front crossmember.
The starting position for the front crossmember is ten inches from the center of the frame rivet, but before drilling and mounting the crossmember, the crossmember was slid until the torque arm’s front connection was vertical. Then, the crossmember was torqued to the frame bracket hardware before the frame was drilled for the crossmember mounting holes.
The red anodized torque arm stabilizer was connected to the front crossmember and torqued to 37 ft-lb, and a right-hand jam nut was then installed onto one right-hand rod end, and into the right-hand threaded end of the brace bar. This was repeated for the left-hand side of the brace bar as well. Then, the linkage adjuster was installed with a jam nut into the left-hand threaded bent end of the Panhard bar, before the rod end with a jam nut was installed into the female end of the linkage adjuster.
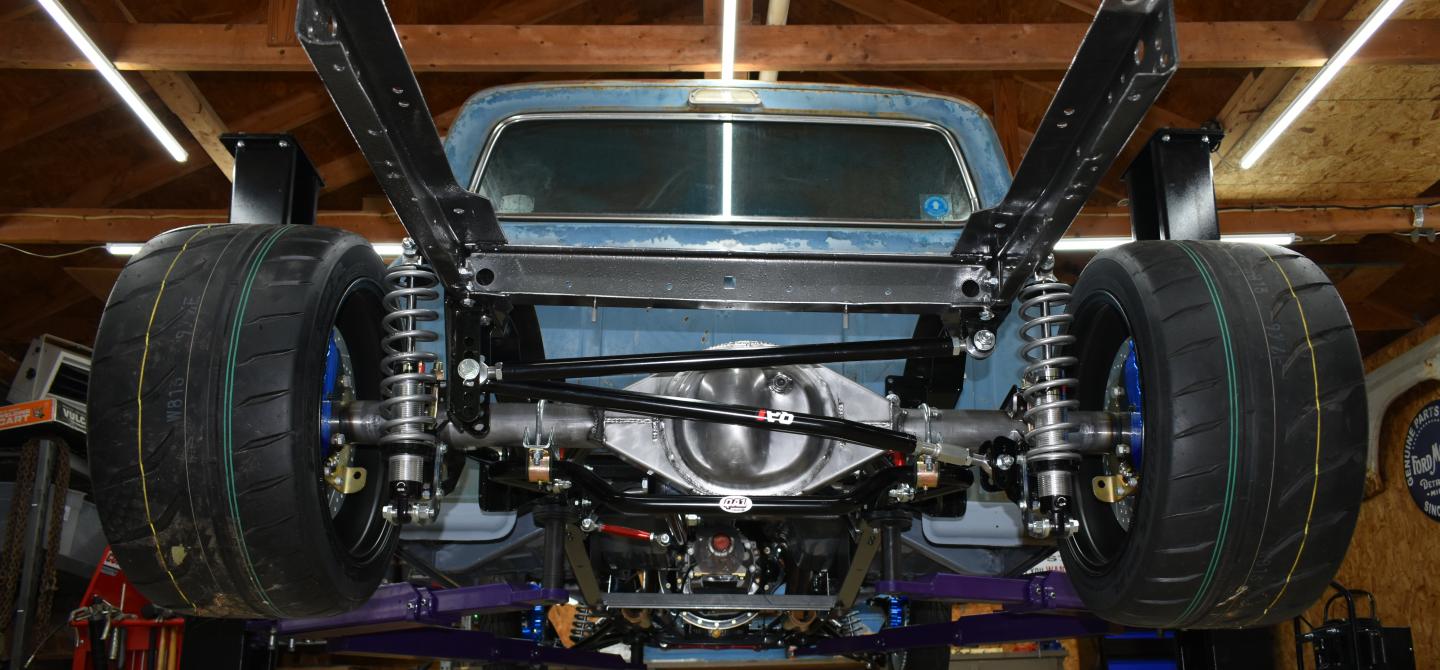
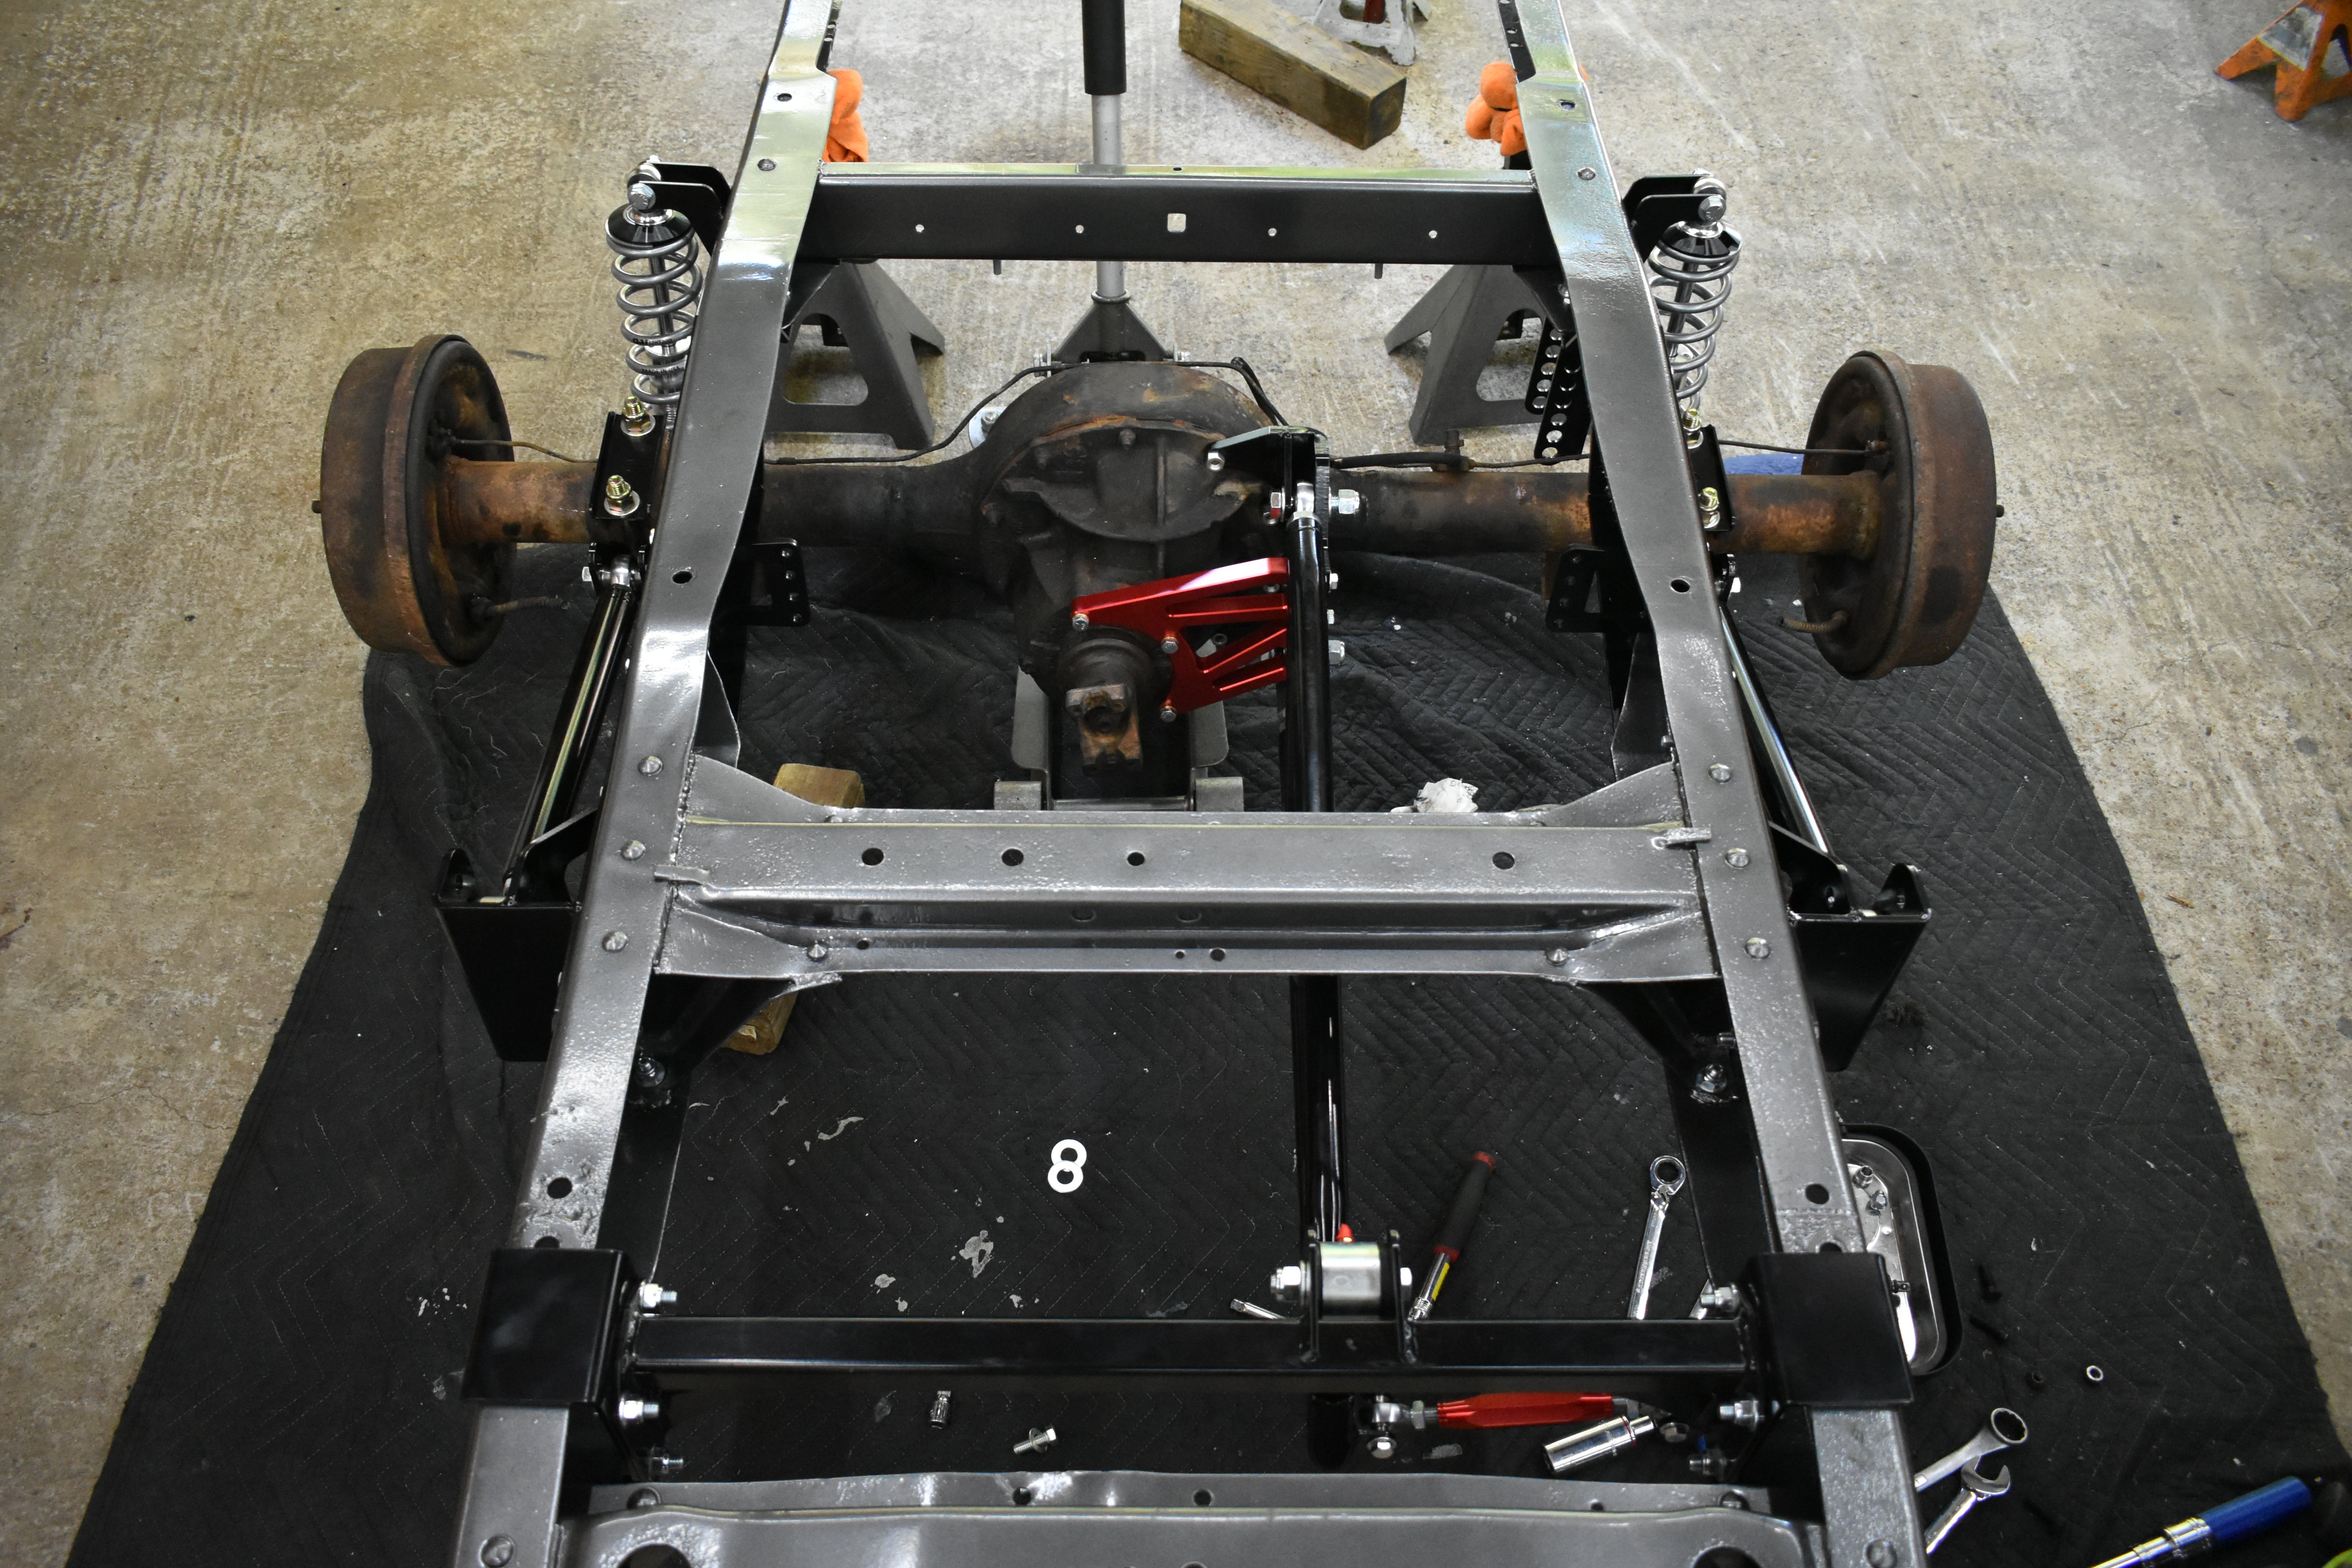
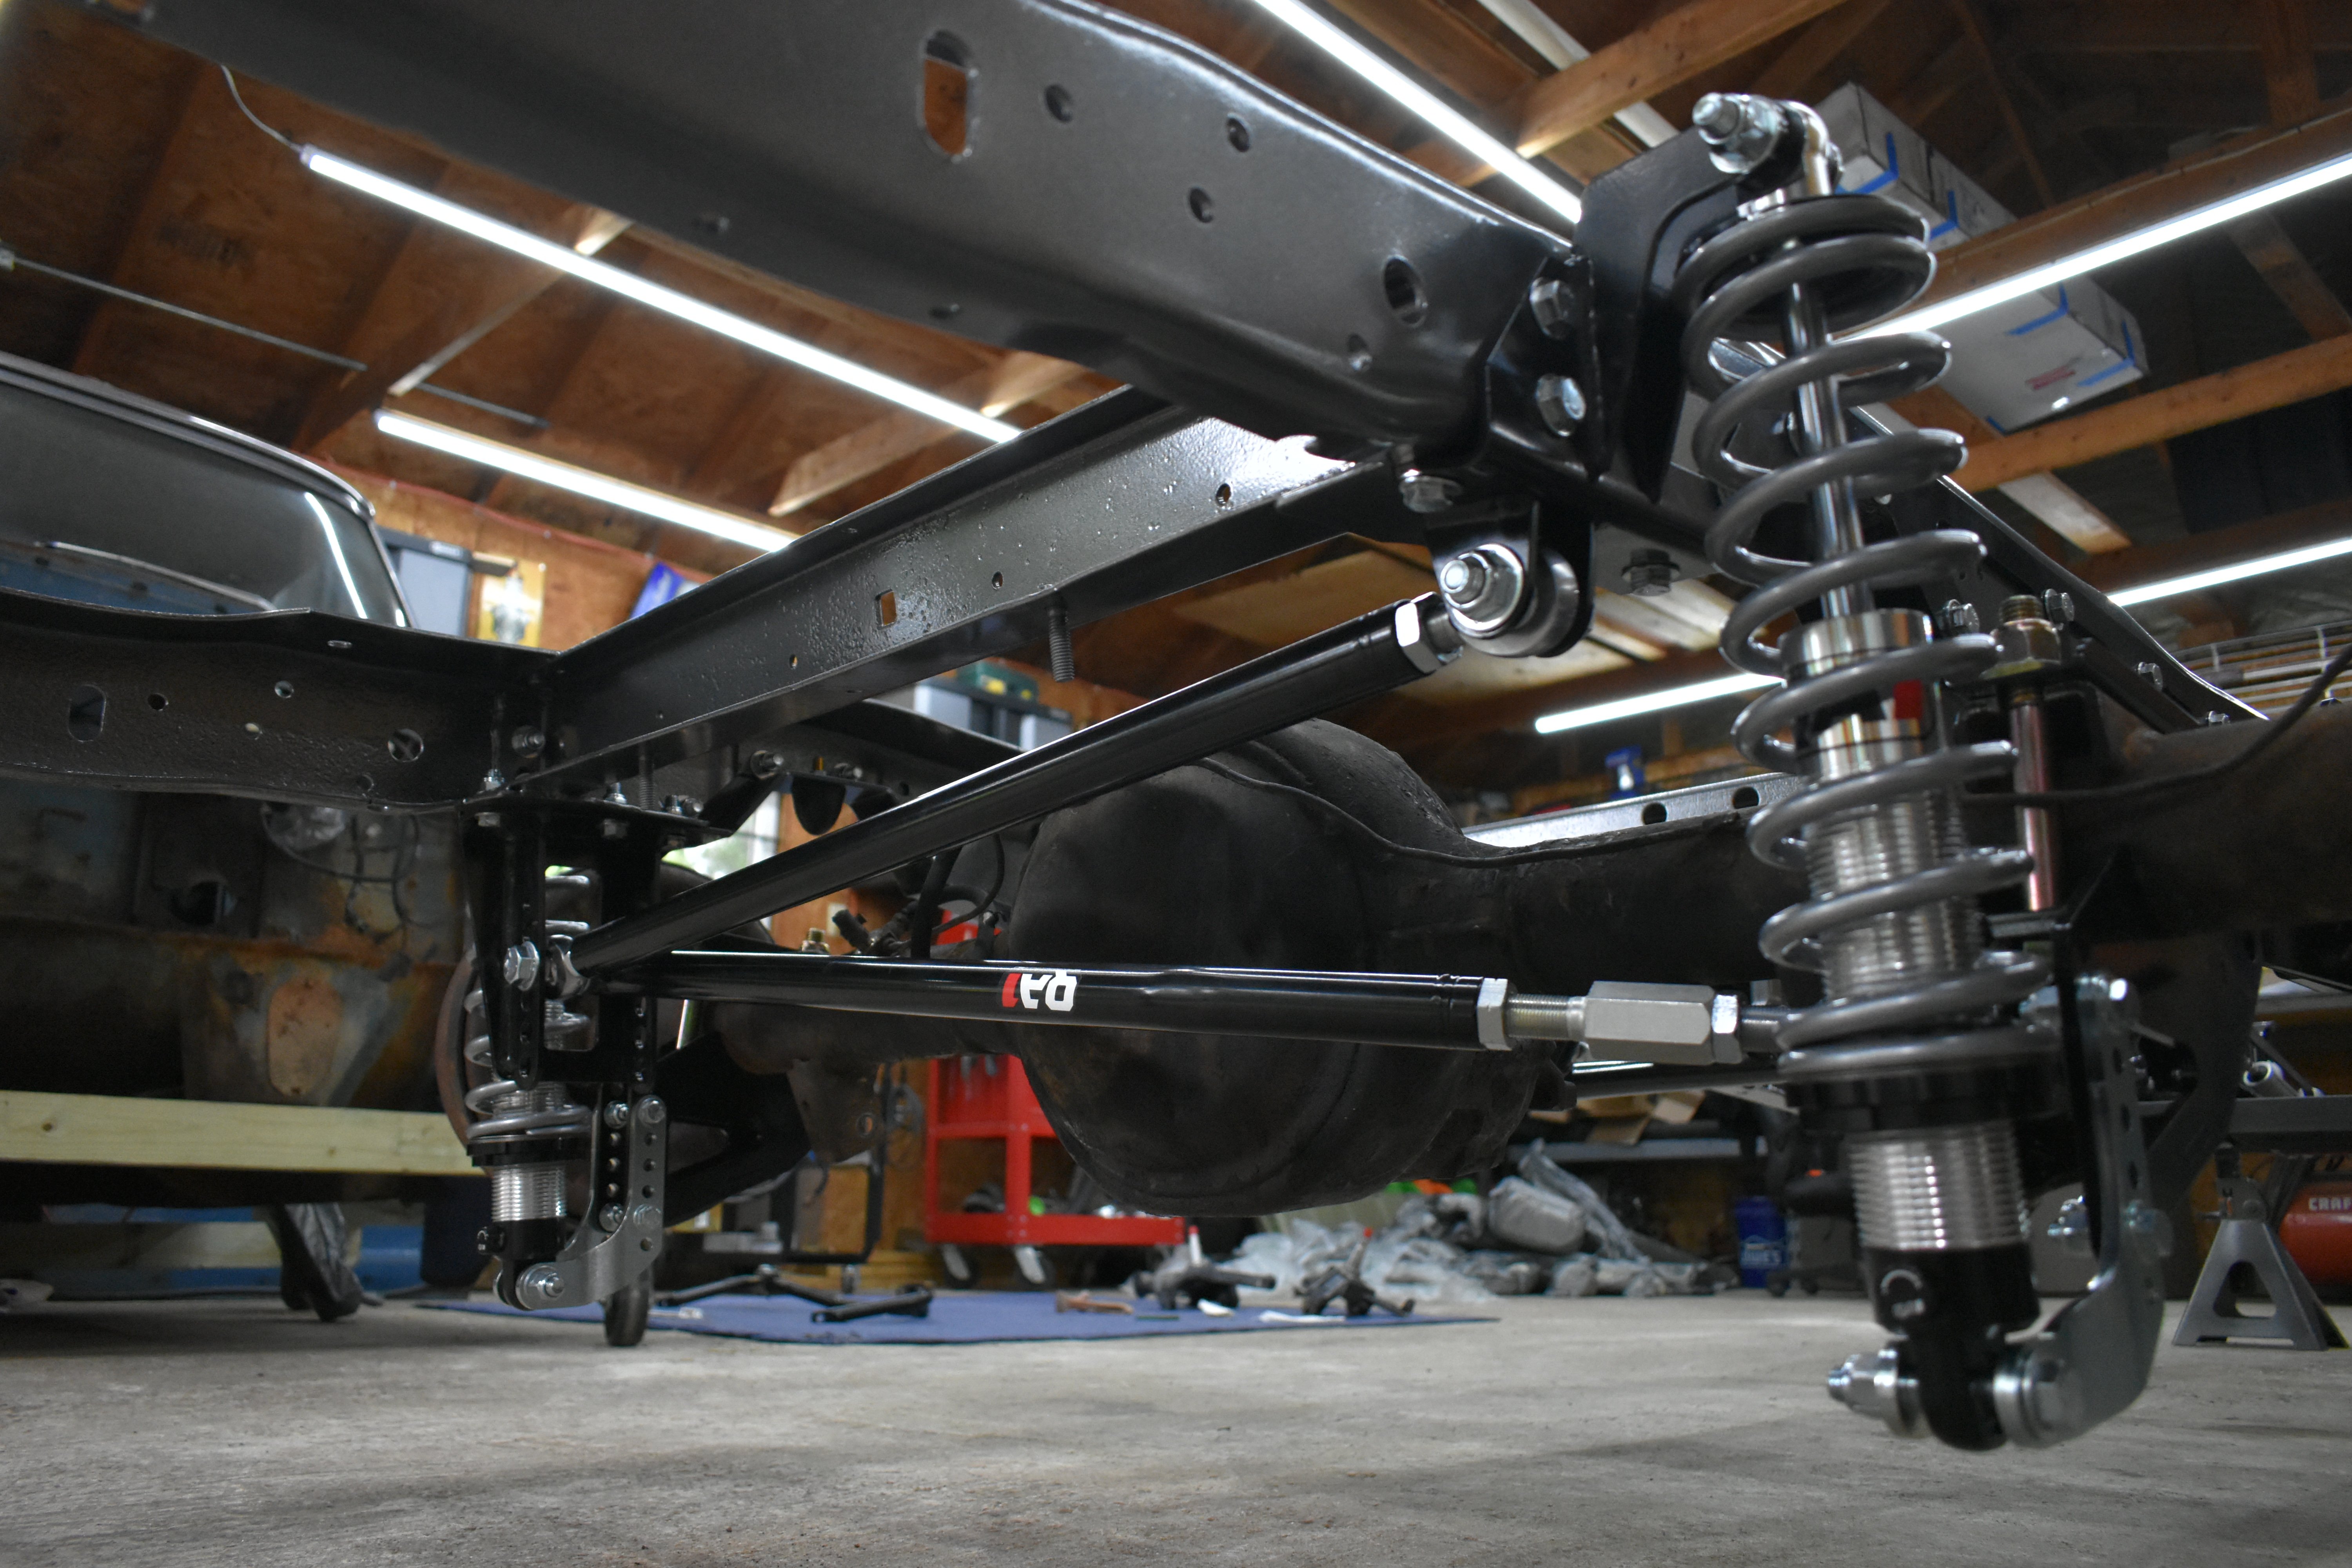
From left to right: torque arm, panhard brace bar, and driver's side trailing arm installed.
One end of the brace bar and the straight end of the Panhard bar were inserted into the third hole down on the driver-side mounting bracket. Then, the rod end of the brace bar was installed with two spacers. A washer was installed between the rod ends spacer and the bushing of the Panhard bar, which then mounted to the front of the brace bar.
Ivan adjusted the brace bar length in order to attach it to the passenger side mount, with spacers on both sides of the rod end. Then, the linkage adjuster in the Panhard bar was adjusted to be able to install it into the middle hole of the passenger side bracket, with high-misalignment spacers on both sides of the rod end, before being torqued to 90 ft-lb.
The final product!
With the installation complete, Ivan will be able to set the Panhard bar mounting location once he figures out the final ride height and adjusts the coilovers. After that adjustment, he’ll go back and snug up all of the jam nuts. This will mean that the trailing arm and Panhard bar will both be parallel to the ground, and the torque arm front support will also be adjusted so that the torque arm is parallel to the frame rails. Final pinion angle adjustments will be measured and made once the truck is full-weight and on the ground. At that time, Ivan will double check all of his hardware connections and have a four-wheel alignment done.
It’s worth noting that this is a benefit of the kit. The fact that the Panhard bar, torque arm, trailing arms, bracket mounts, and shocks are all adjustable independent of one another allows for unprecedented adjustability, where one component does not affect the others. QA1 really thought this one out in an effort to create a truly adaptive system.
In the next installment of our Project F Word, we choose stopping power with Baer Brakes! Stay tuned!